| |
Running the arm_navigation stack on the Barrett WAM (Fuerte)
Description: A tutorial teaching how to set up and run the arm_navigation stack on the Barrett WAM.Tutorial Level: INTERMEDIATE
Next Tutorial: object_manipulation/Tutorials/Running the object_manipulation stack on the Barrett WAM (Fuerte)
Contents
Introduction
This tutorial goes through the steps required to have the arm_navigation stack run on the Barrett WAM starting with a new installation of Ubuntu Linux. All the packages created in this tutorial are included in the CSIR manipulation repository in the _wam_tutorials directory. Their names have been pre-appended with an underscore.
Prerequisites
Download and install Ubuntu 12.04 (Precise) (64-bit). This tutorial assumes a user name of wam-ctrl and a computer name of wam-ext-pc. With regards to installing Ubuntu, the following additional steps are optional but recommended.
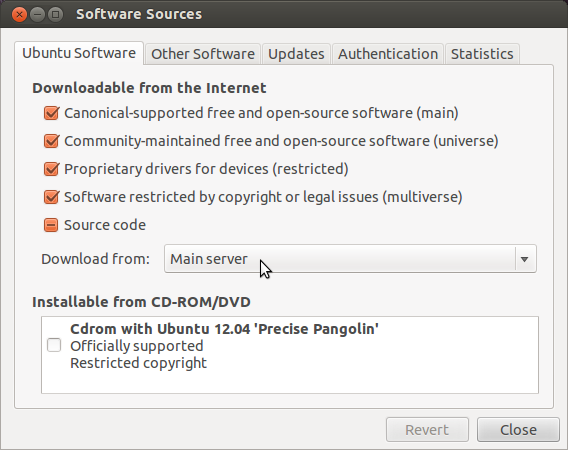
Use the main server to download software:
[Alt+F2] > Ubuntu Software Center > Edit > Software Sources > Download from: Main server
Update software (this may take a while) in the terminal
[Alt+F2] > Terminal
$ sudo apt-get update
$ sudo apt-get upgrade
and/or through the GUI
[Alt+F2] > Update Manager > Check > Install Updates
Download, install and configure ROS Fuerte and rosws for Ubuntu 12.04 (Precise) (ros-fuerte-desktop-full) from packages following this tutorial and performing the rosbuild (rather than catkin) specific steps. After completing the configuration tutorial typing roscd in the terminal should take you to the directory ~/fuerte_workspace.
- Download and install the pr2-desktop stack (1.4 GB) which includes most of the dependencies for arm navigation on the WAM.
$ sudo apt-get install ros-fuerte-pr2-desktop vim
- You will be shadowing and patching stacks and packages, some of which are already in the principal ROS directory (i.e. /opt/ros/fuerte) in your ROS workspace (~/fuerte_workspace/sandbox). Doing this simplifies code modification and debugging without compromising the integrity of the ROS installation.
[Alt+F2] > Terminal
$ roscd
$ cd sandbox

$ rosws set barrett-ros-pkg --svn http://web.barrett.com/svn/barrett-ros-pkg/trunk --version-new=25
$ rosws update sandbox/barrett-ros-pkg

$ rosws set arm_navigation --git https://github.com/willowgarage/arm_navigation.git --version-new=fuerte
$ rosws update sandbox/arm_navigation

$ rosws set arm_navigation_experimental --git https://github.com/willowgarage/arm_navigation_experimental.git --version-new=fuerte
$ rosws update sandbox/arm_navigation_experimental
- The CSIR (Council for Scientific Research) manipulation project repository contains patches, ROS packages and supporting software for running the arm navigation and object manipulation stacks on the Barrett WAM.
$ roscd
$ rosws set csir_manipulation --git https://csir.manipulation@code.google.com/p/csir-manipulation/ --version-new=fuerte
$ rosws update csir_manipulation
- Apply the patches. The arm_navigation patch fixes a bug in the 'get_constraint_aware_ik' service which caused it to return false whenever a valid inverse kinematic solution was not found. The arm_navigation_experimental patch corrects the operation of the 'interpolated_ik_motion_planner.py' script with a single arm. The barrett-ros-pkg patch adds a new service for executing joint trajectories to the Barrett ROS stack.
$ roscd
$ cd sandbox
$ patch -p0 < ~/fuerte_workspace/csir_manipulation/csir_intelligent_manipulator/arm_navigation.patch
$ patch -p0 < ~/fuerte_workspace/csir_manipulation/csir_intelligent_manipulator/arm_navigation_experimental.patch
$ patch -p0 < ~/fuerte_workspace/csir_manipulation/csir_intelligent_manipulator/barrett-ros-pkg.patch
$ rosmake arm_navigation
$ rosmake arm_navigation_experimental
Configuring arm navigation for the Barrett WAM
The instructions that follow are based on the IROS 2011 tutorial on motion planning. The arm navigation wizard simplifies the generation of configuration files for the manipulator. The wizard uses a URDF (universal robot description file) to acquire information about the manipulator. You can either use the model available in the package csir_wam_description (which is itself based on the URDF's in the guardian-wam and hector projects) or create a new package to house your own URDF (recommended):
$ roscd
$ roscreate-pkg wam_description urdf xacro
$ rosws set wam_description
$ source ~/fuerte_workspace/setup.bash
$ roscd wam_description
$ mkdir urdf && cd urdf
$ roscp csir_wam_description csir_wam.urdf wam.urdf
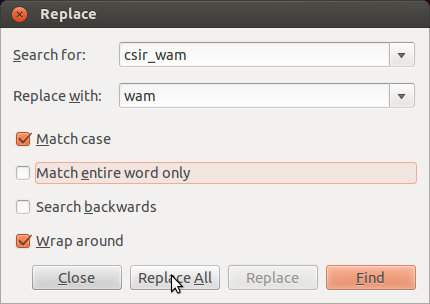
Edit the URDF file ($ gedit wam.urdf > Search > Replace...) to change every occurence of the robot name from "csir_wam" to "wam" in wam.urdf.
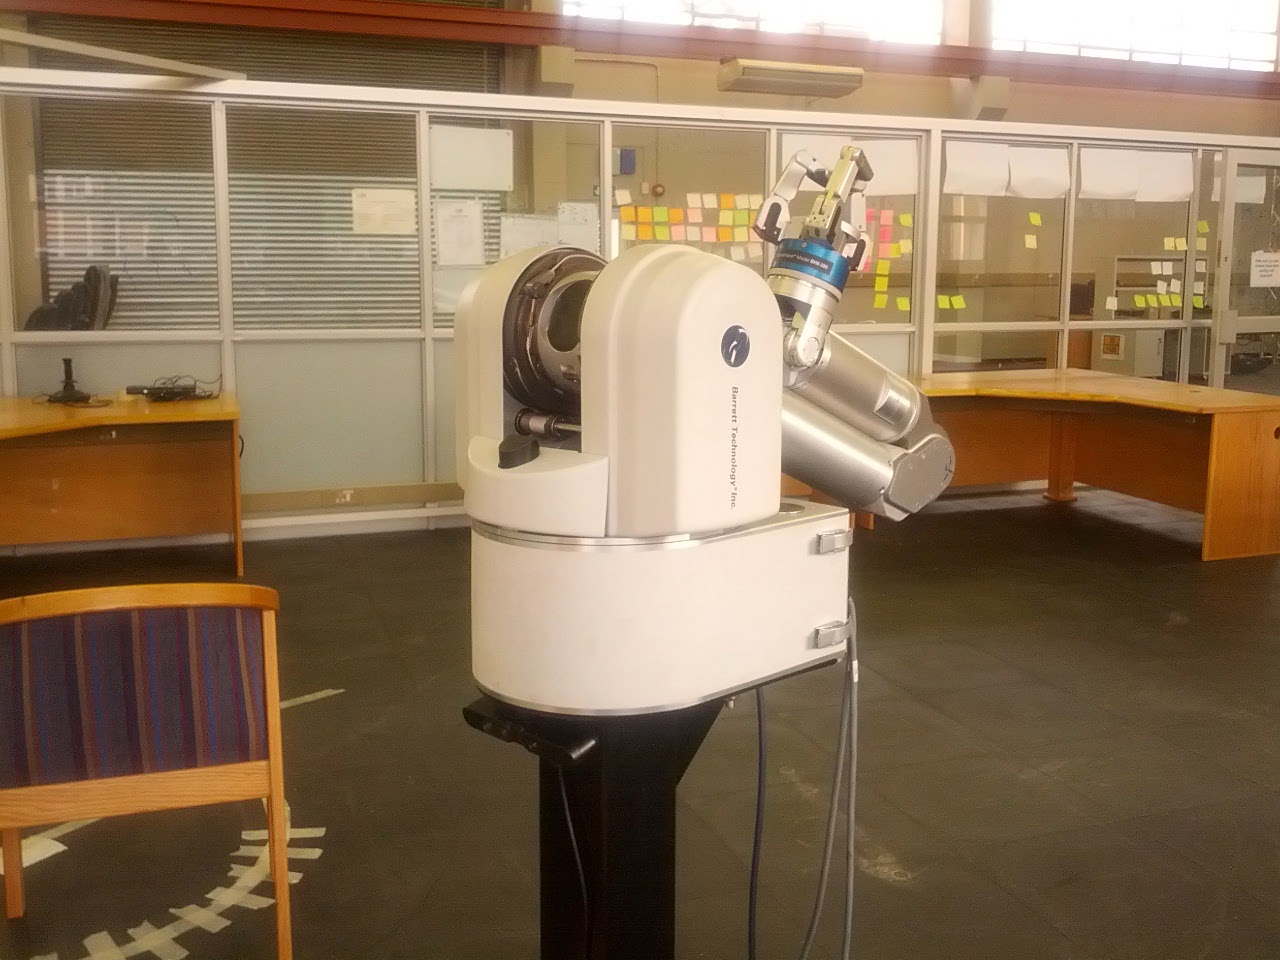
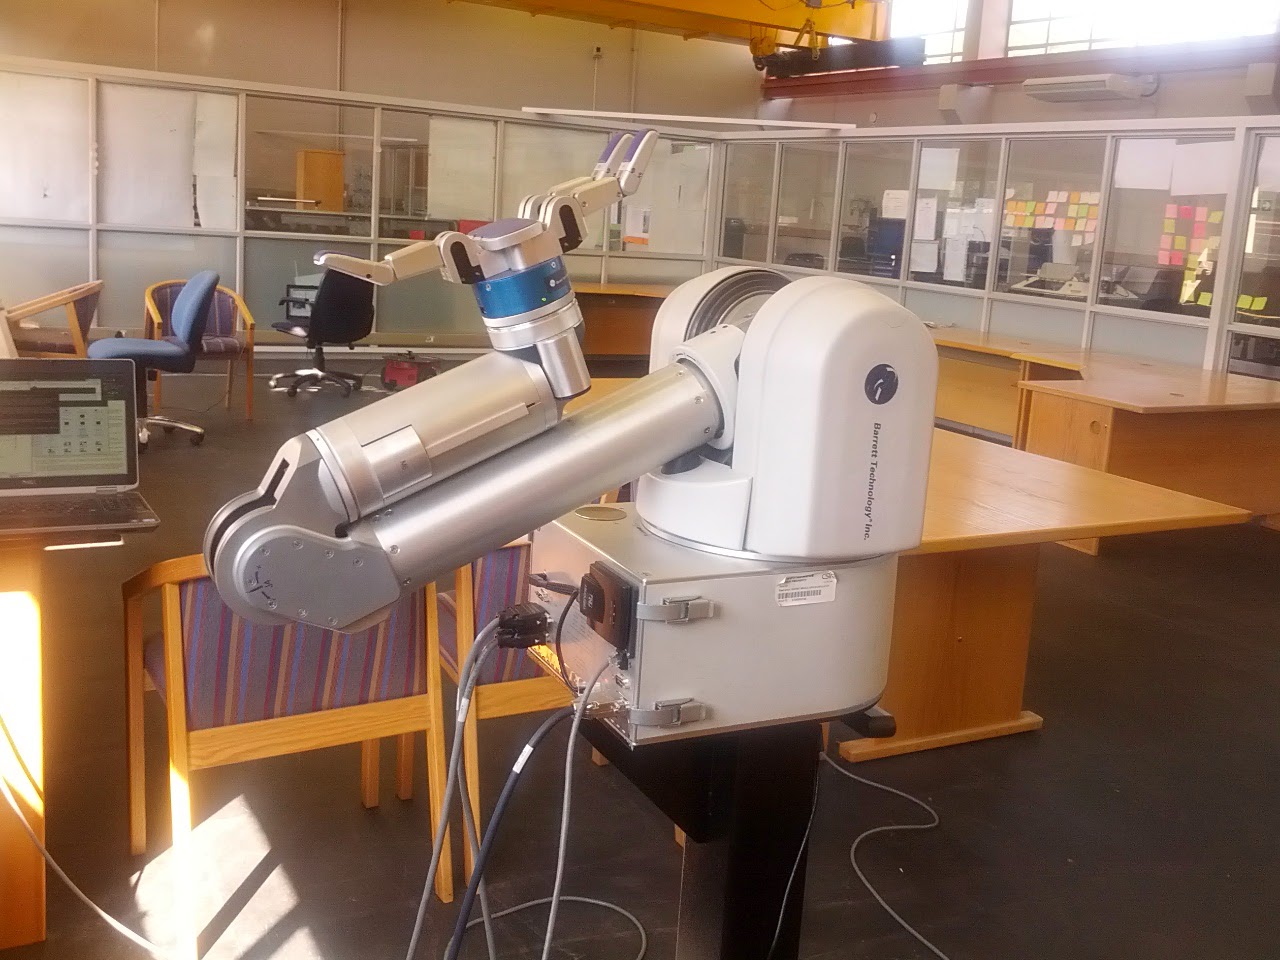
The URDF includes a depth camera attached to the base of the unit as show in the photo below.
You also need to copy over the 3D meshes (originally from the guardian WAM and hector projects) from the CSIR project.
$ roscd wam_description
$ mkdir meshes && cd meshes
$ cp ~/fuerte_workspace/csir_manipulation/csir_intelligent_manipulator/csir_wam_common/csir_wam_description/meshes/*.mesh .
$ cp ~/fuerte_workspace/csir_manipulation/csir_intelligent_manipulator/csir_wam_common/csir_wam_description/meshes/*.stl .
$ cp ~/fuerte_workspace/csir_manipulation/csir_intelligent_manipulator/csir_wam_common/csir_wam_description/meshes/*.dae .
You can now generate the configuration files from the URDF.
$ roscd
$ roslaunch planning_environment planning_description_configuration_wizard.launch urdf_package:=wam_description urdf_path:=urdf/wam.urdf
Note: In order for RViz to display models correctly you may have to install graphics drivers for Ubuntu. [Alt+F2] > Additional Drivers; then select and install the recommended driver.
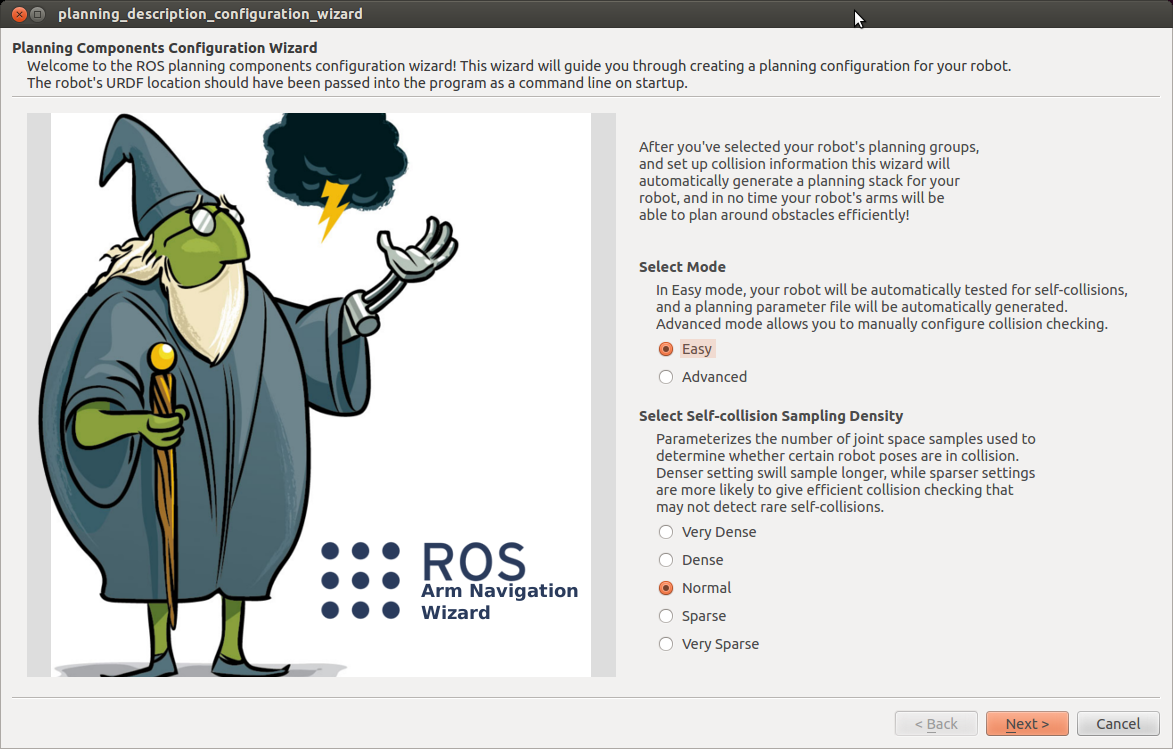
- Use the default settings for the collision configuration modes and density on the introductory page.
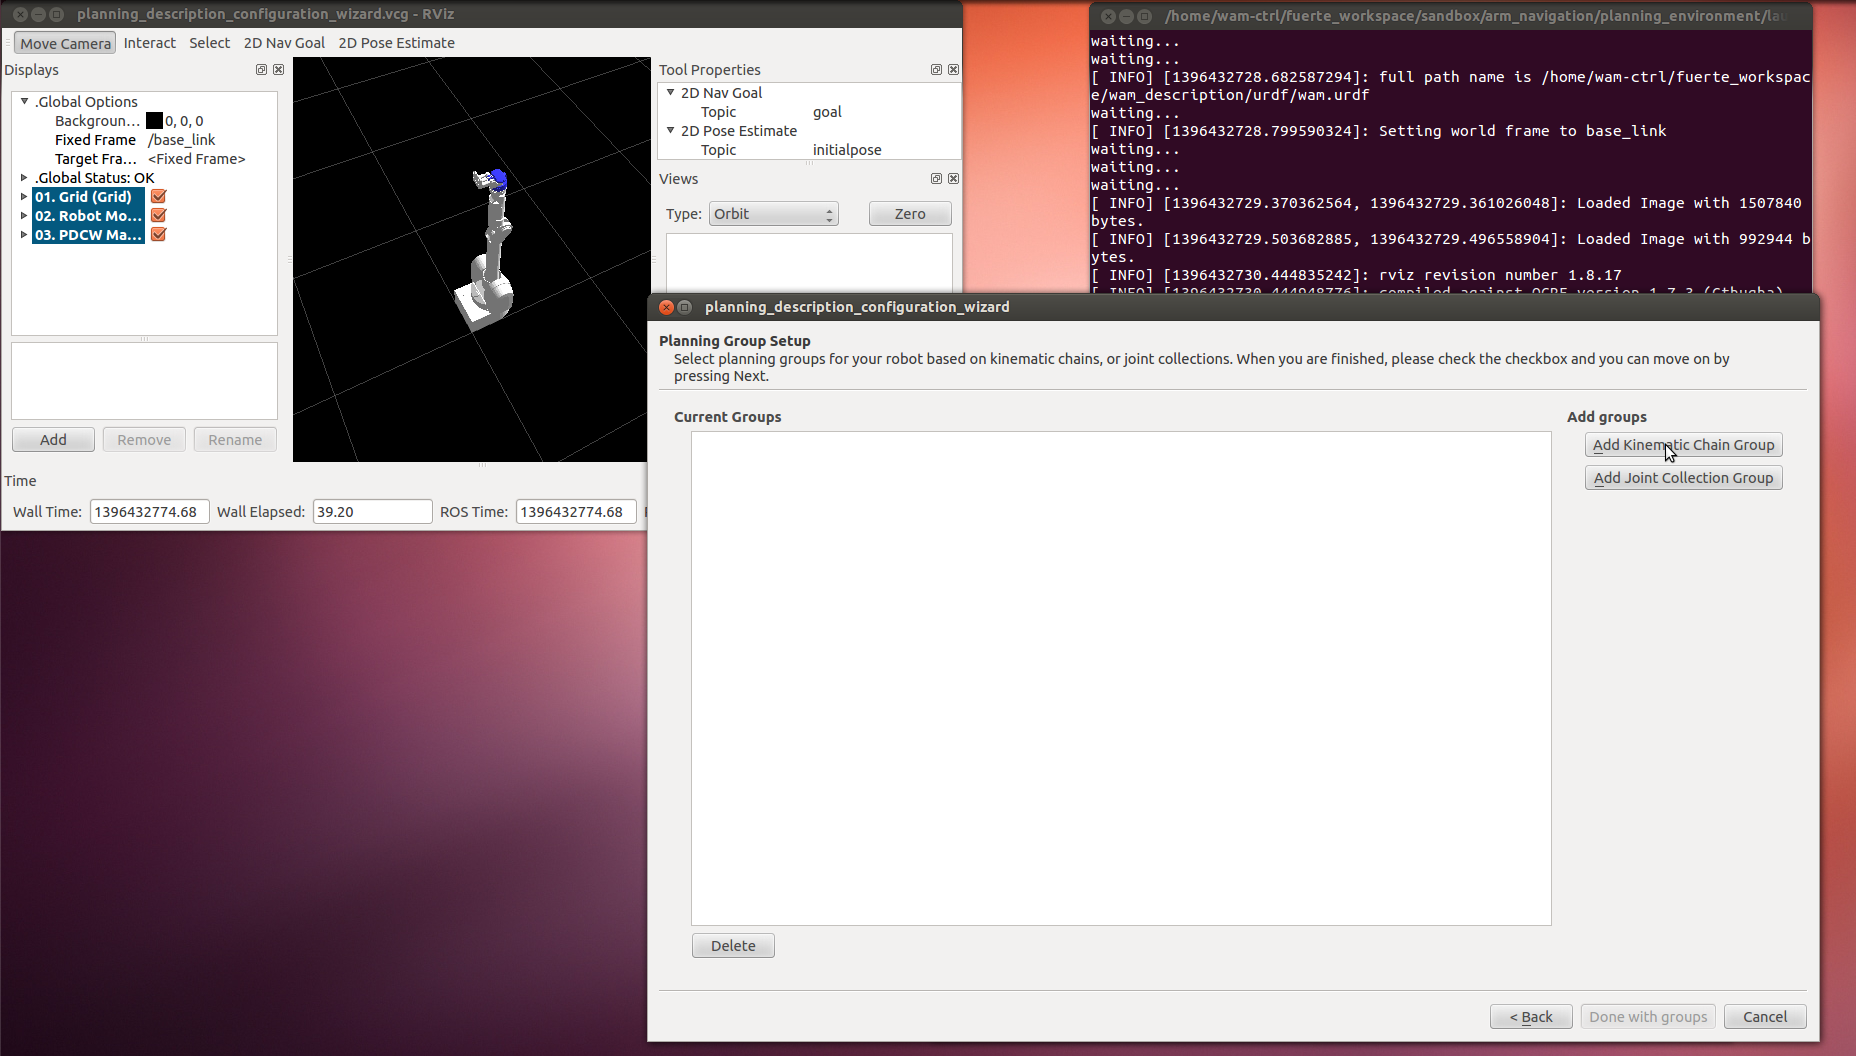
- Next, you will add planning groups.
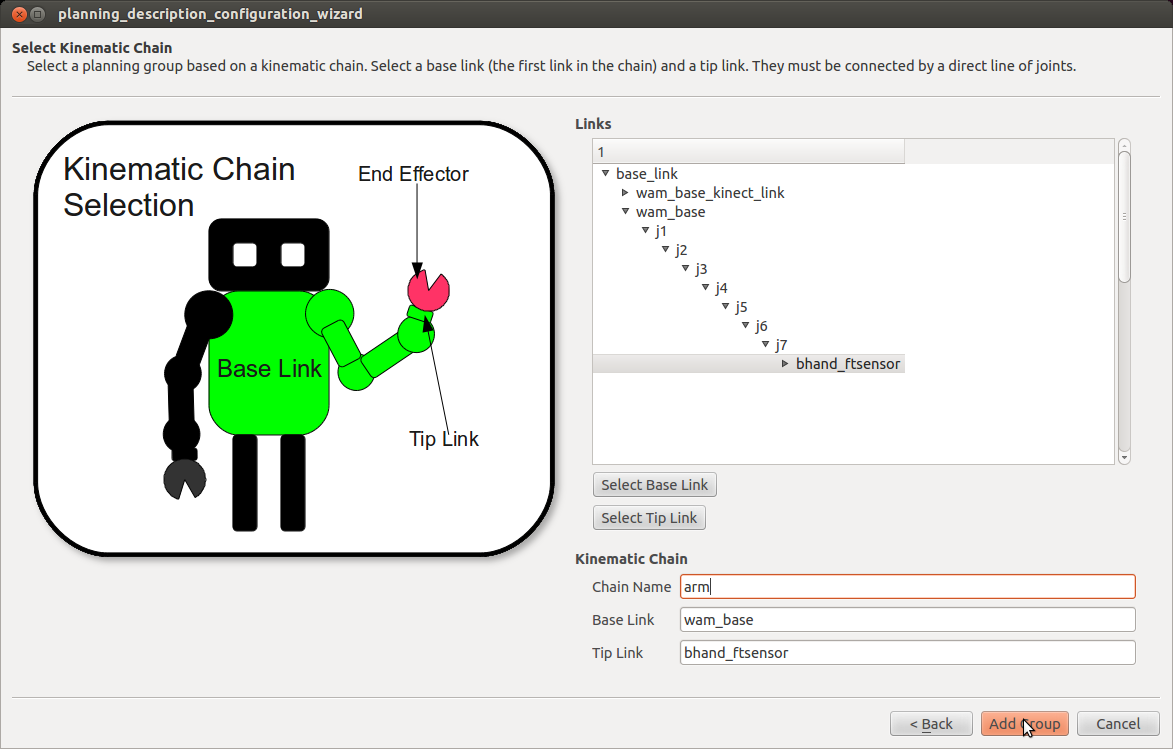
- First, "Add Kinematic Chain Group" for the arm with the following parameters:
- Chain Name: arm
- Base Link: wam_base
- Tip Link: bhand_ftsensor
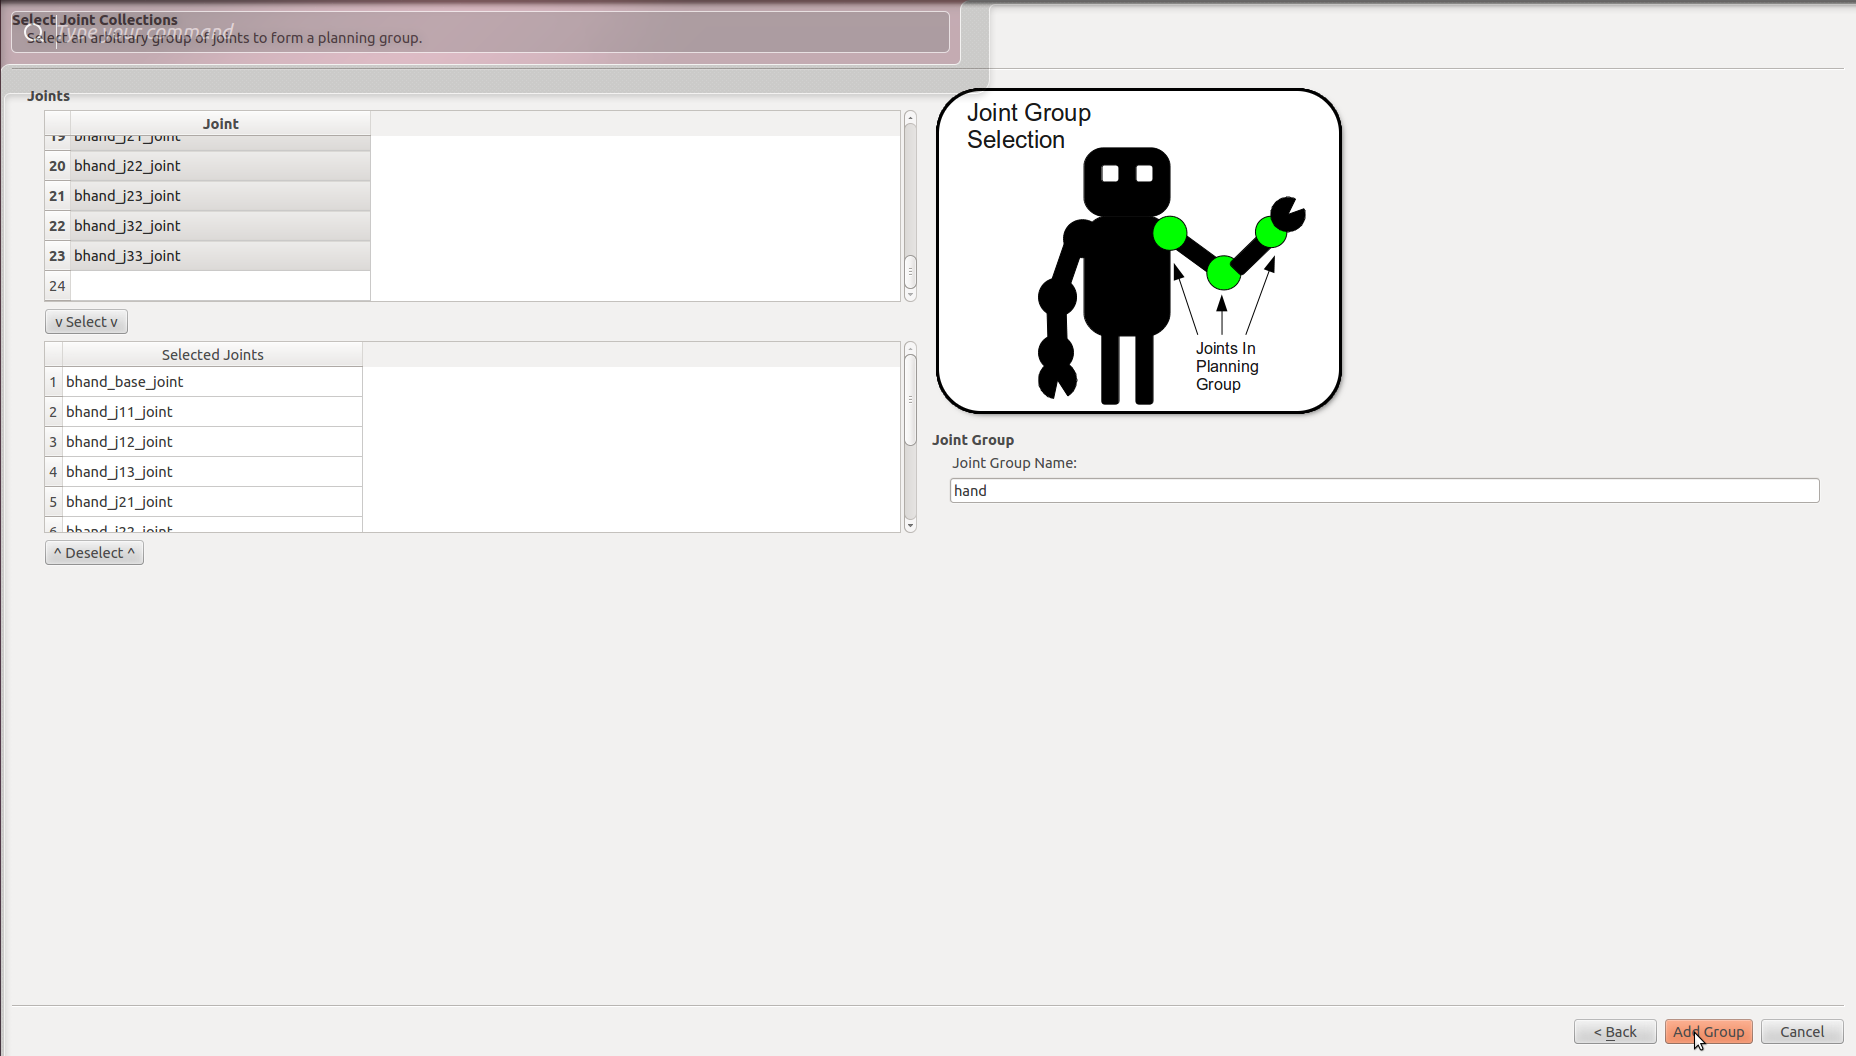
- Now "Add Joint Collection Group" for the hand, shift selecting all joints from bhand_ftsensor_joint to bhand_j33_joint and naming the group "hand".
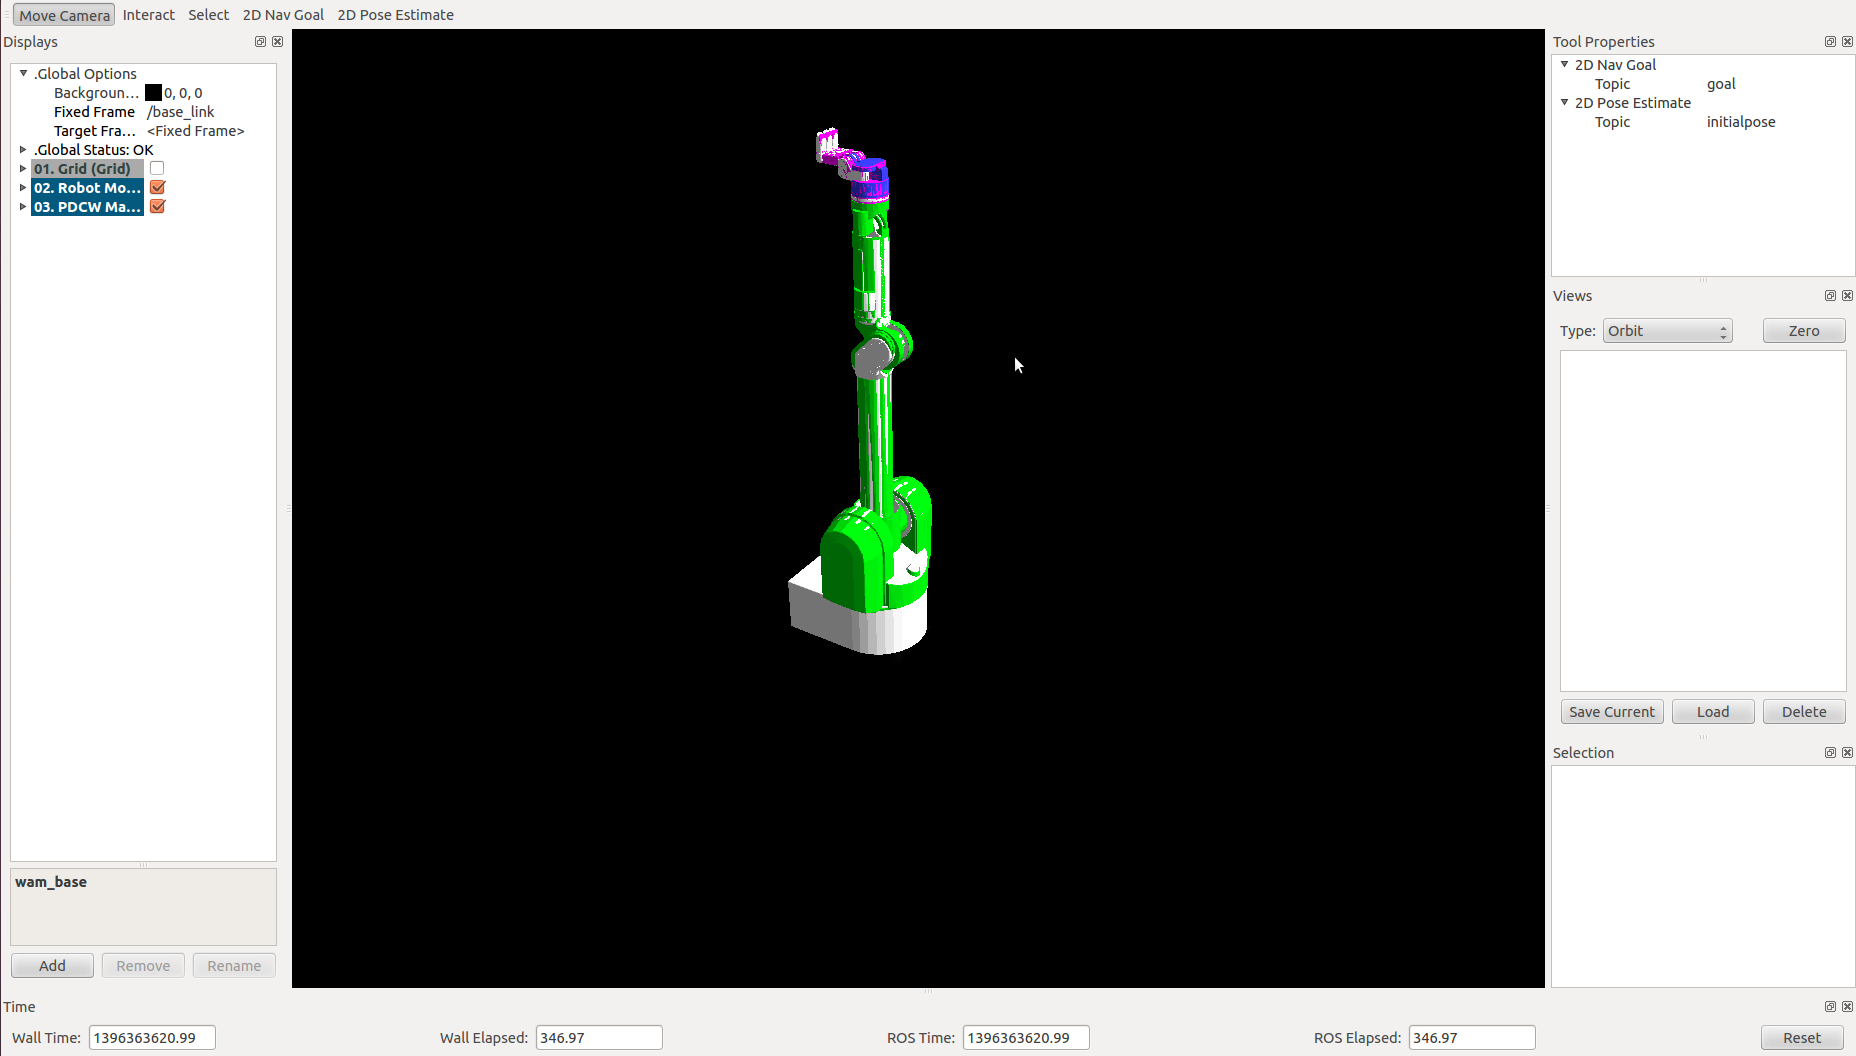
- "Return To Groups" after adding the hand group. Verify that the groups are highlighted correctly in RViz when selected in the configuration wizard. Then move on by clicking "Done with groups".
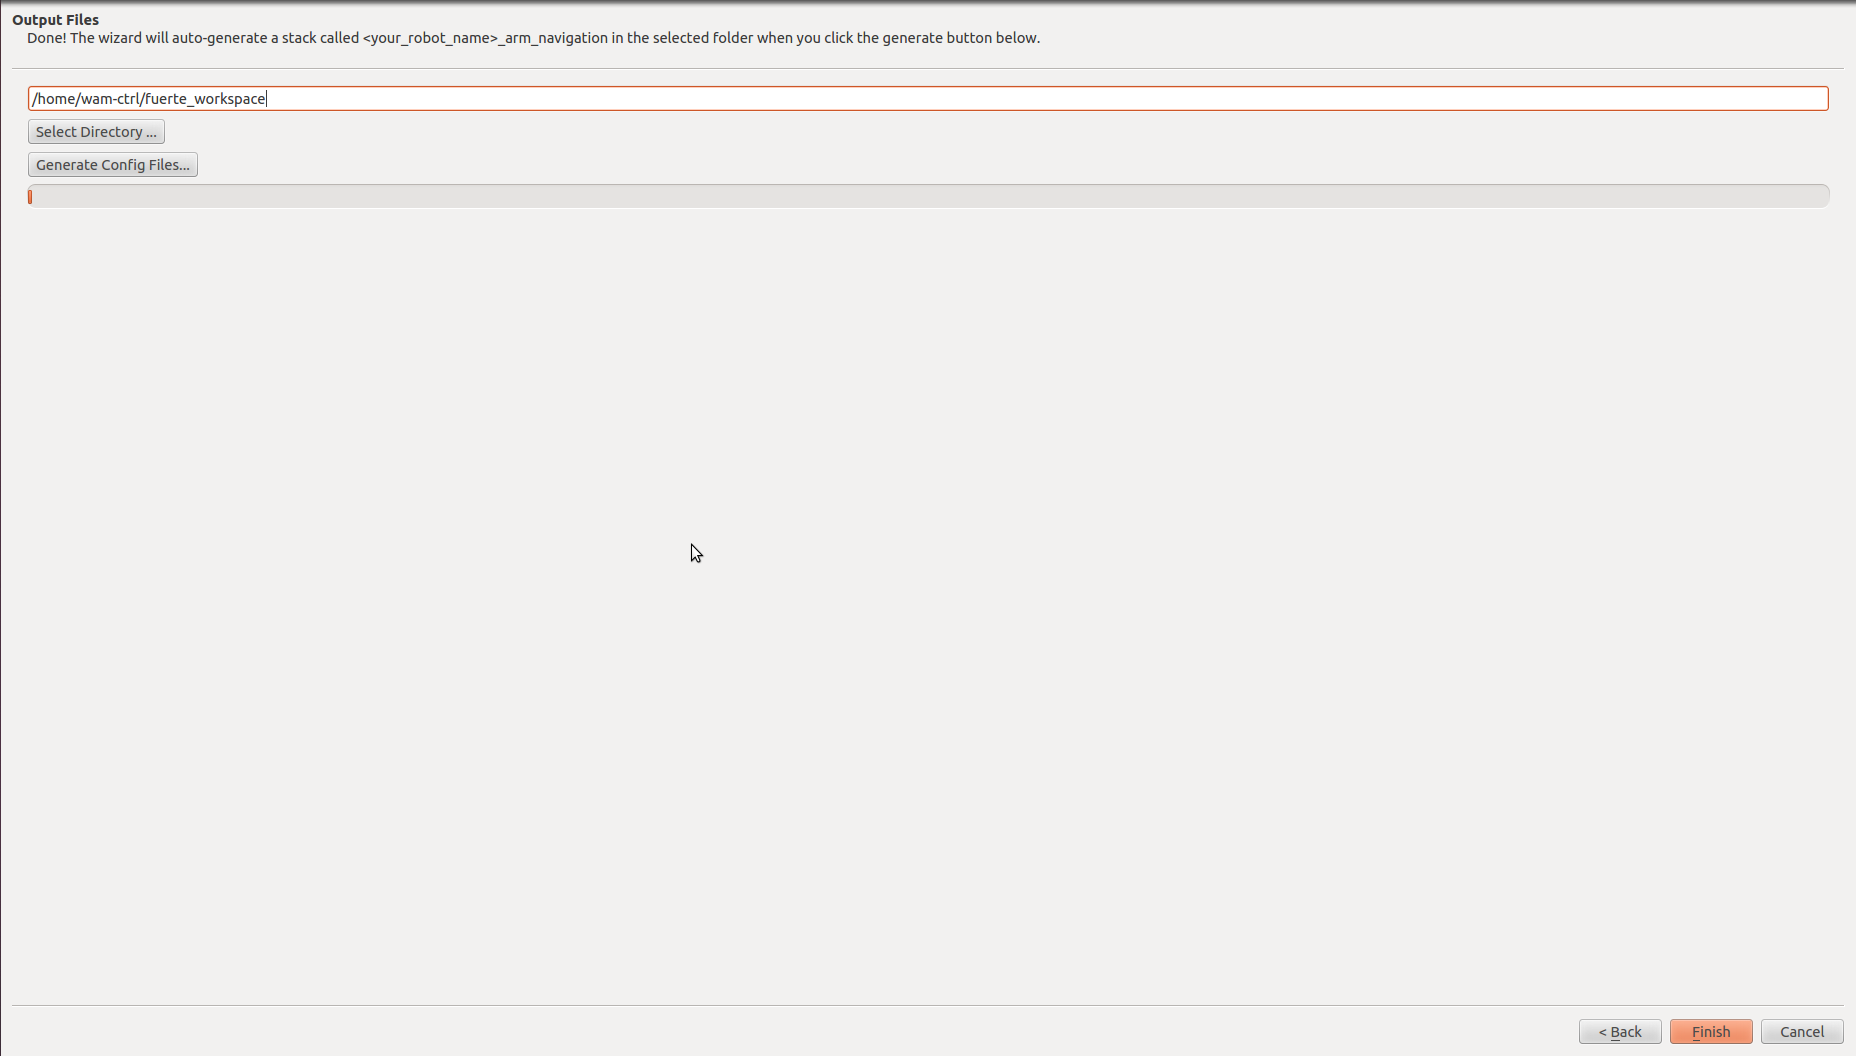
- Select your ROS_WORKSPACE directory (e.g. /home/wam-ctrl/fuerte_workspace) for output files, then "Generate Config Files" and exit the wizard (ctrl+C in the terminal window). The wizard produces a package named "wam_arm_navigation" containing the generated configuration and launch files.
Visualizing Motion Plans
The Planning Components Visualizer allows interactive generation and viewing of arm motions around obstacles in RViz.
$ roscd
$ rosws set wam_arm_navigation
$ source ~/fuerte_workspace/setup.bash
$ roslaunch wam_arm_navigation planning_components_visualizer.launch
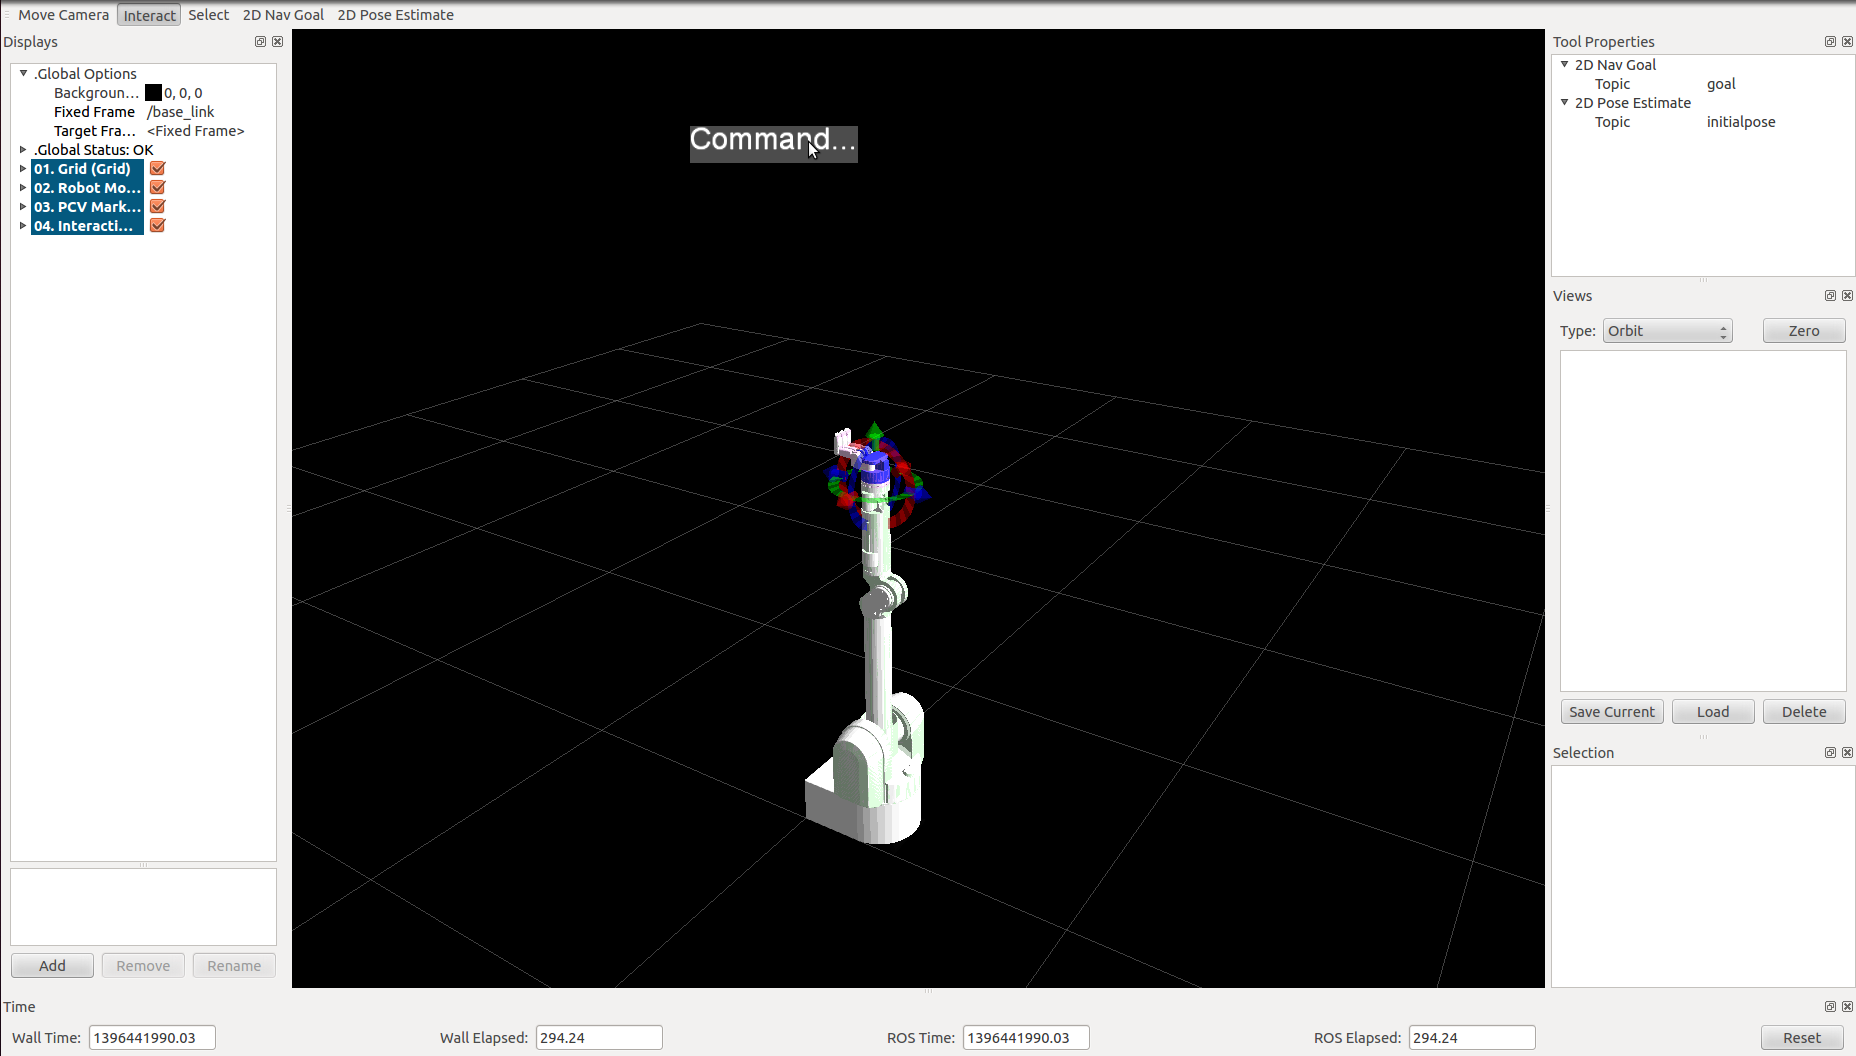
Click the interact button at the top of the RViz window to begin planning arm motions. You may have to adjust your view to see the command button which floats above the robot. Right-clicking this brings up a menu which allows you to:
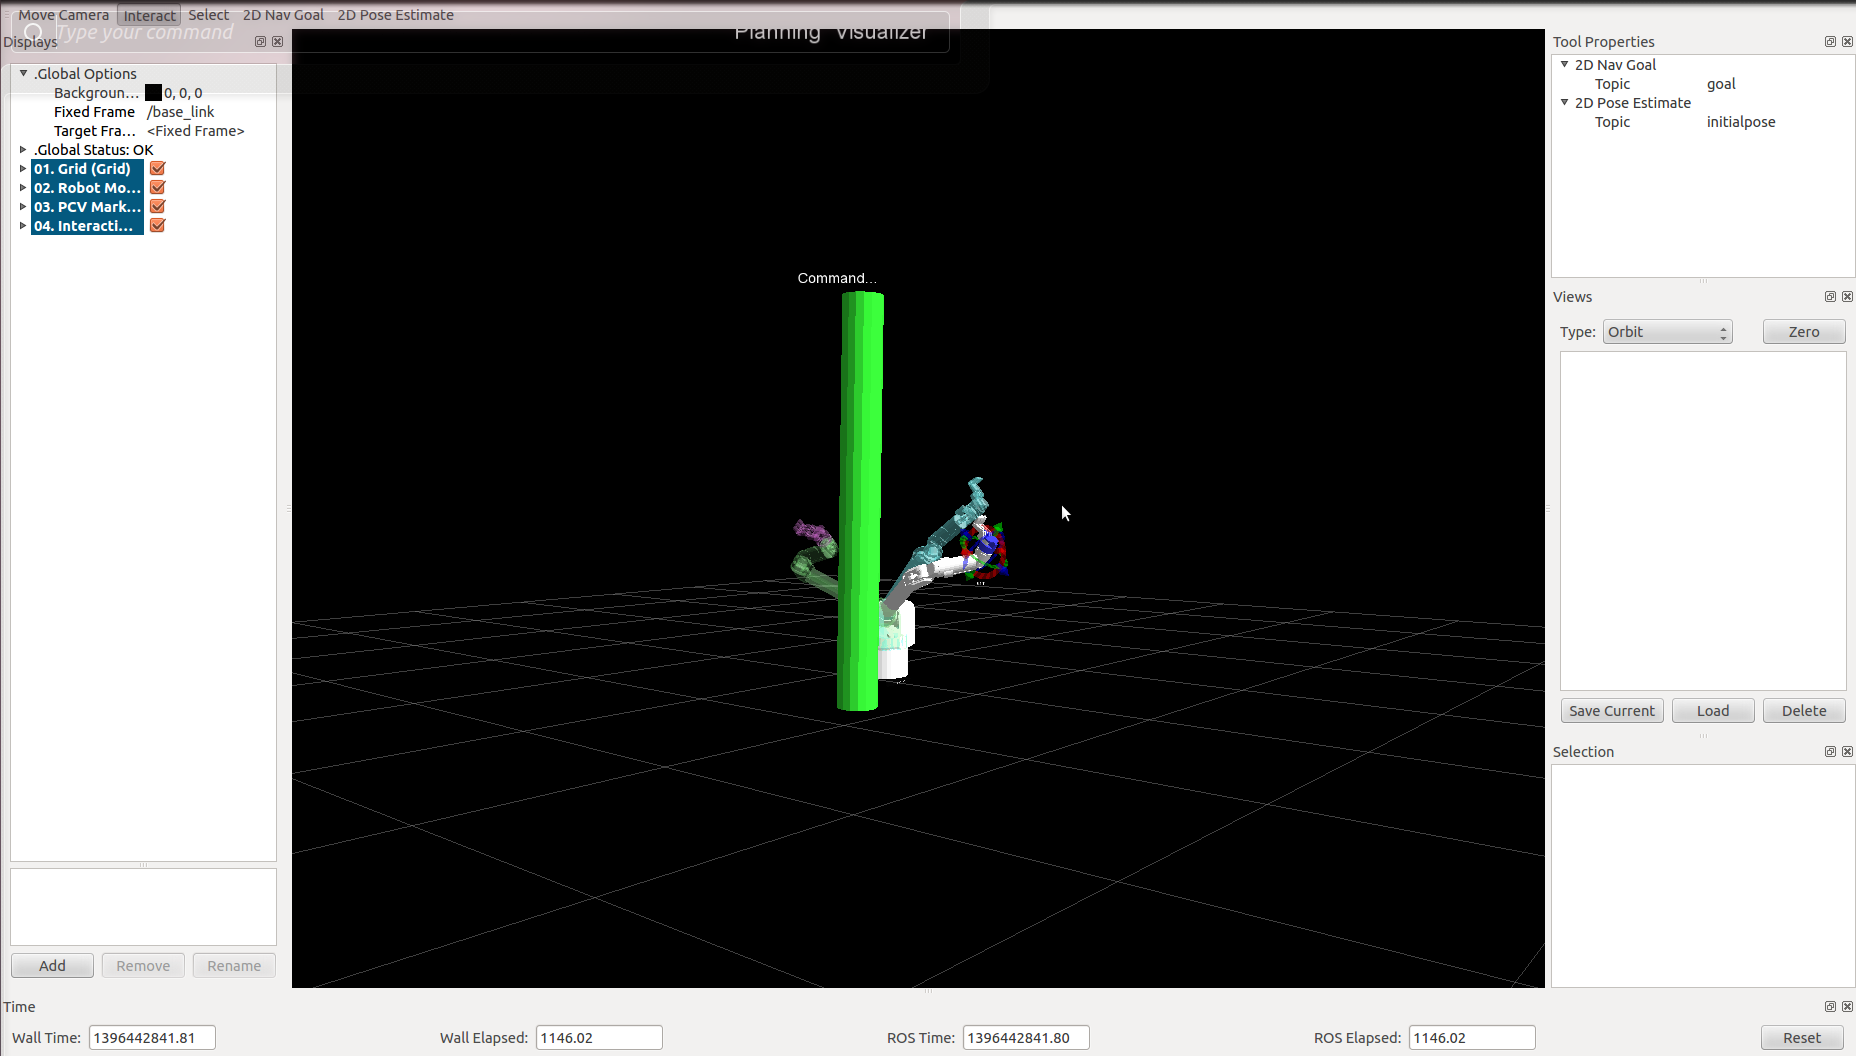
- Add obstacles to the environment using the "Create Pole" option.
- Enable or disable collisions
- Choose either inverse kinematic (IK) or joint control for interacting with the robot.
With IK control you can adjust the position of the hand using the interactive control that is displayed on top of it. To plan a motion
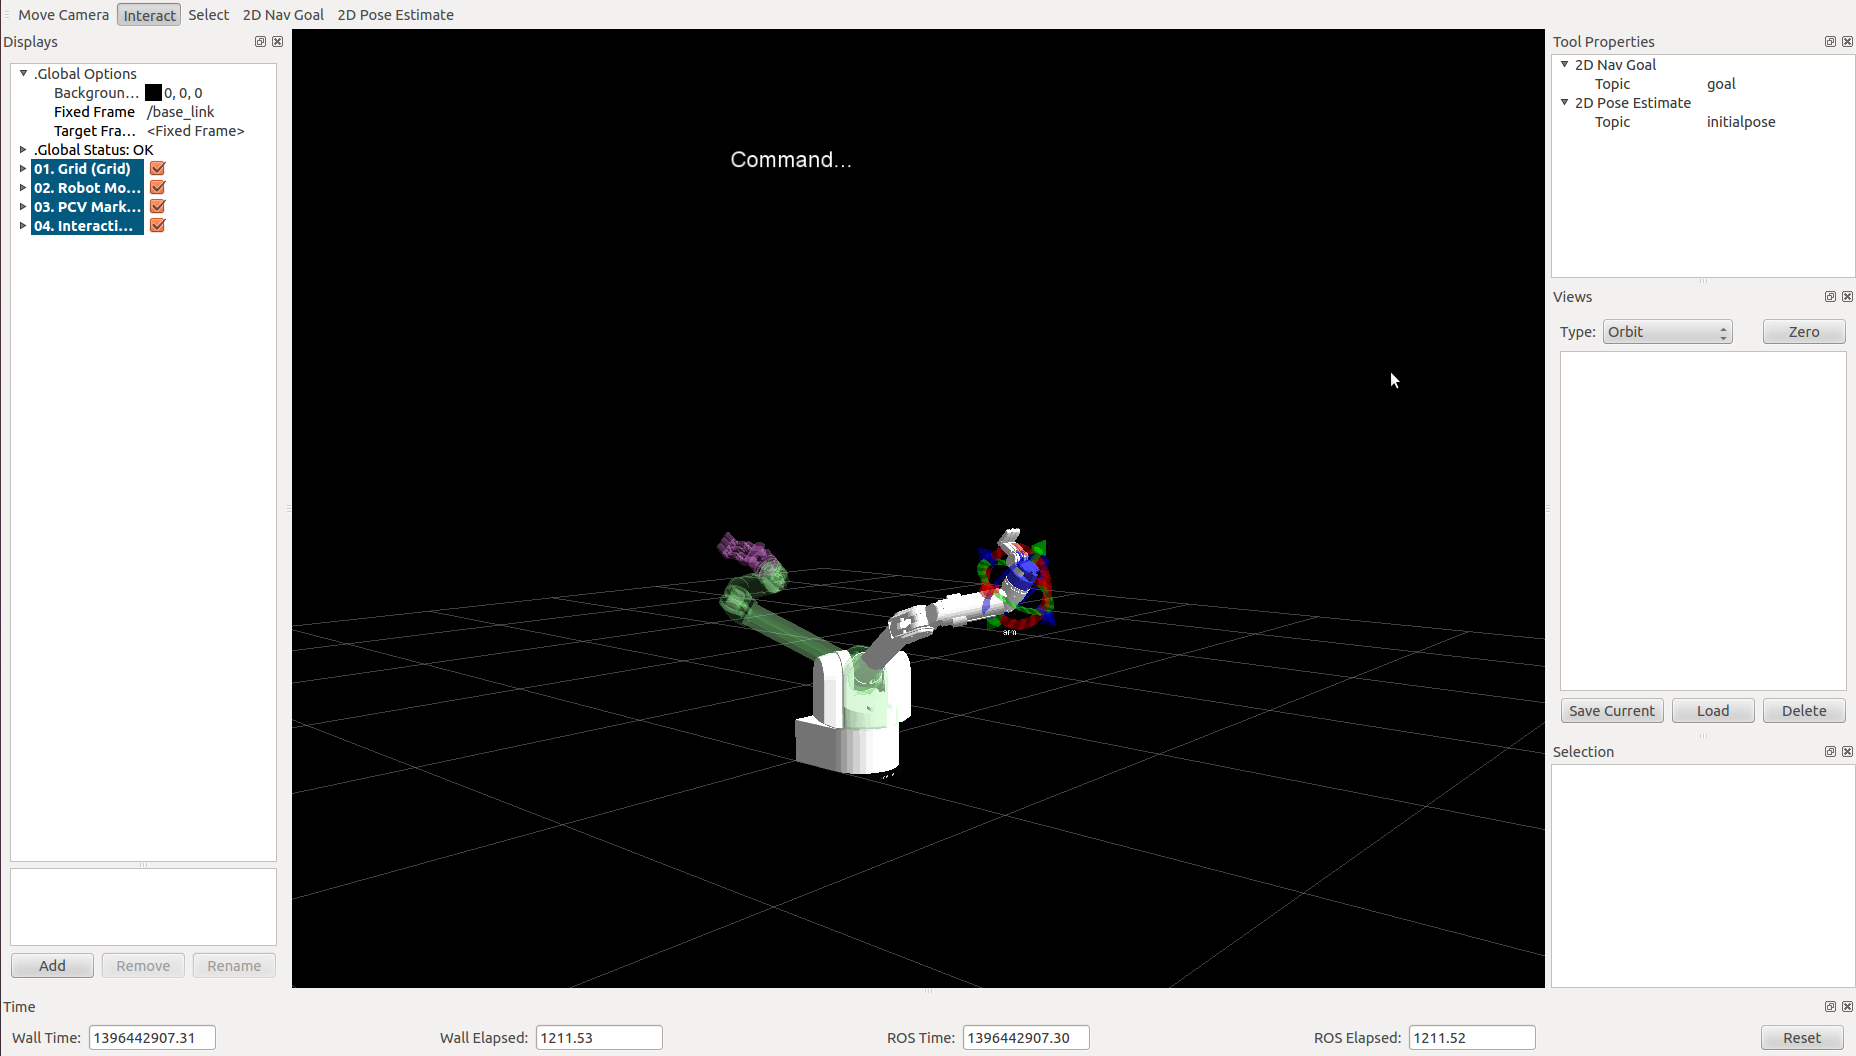
- Move the hand to your desired starting location then right click on the interaction control and "Set Start Position".
- Move the hand to your desired end position and "Set End Position".
- Right click on the interactive control and select "Plan" to plan and view the arm motion.
- Filtering the trajectory ensures that the joint limits specified in the configuration file "joint_limits.yaml" are not exceeded.
- You can also add obstacles via the main command menu and repeat the above steps.
Warehouse Planner
The warehouse viewer is a useful tool for testing motion plans on the real Barret WAM in a controlled, simulated environment. You will first use the warehouse viewer on its own, then connect it to the real robot.
$ rosrun move_arm_warehouse create_launch_files.py wam
This creates the planning_scene_warehouse_viewer_wam.launch file in the wam_arm_navigation package.
$ roslaunch wam_arm_navigation planning_scene_warehouse_viewer.launch
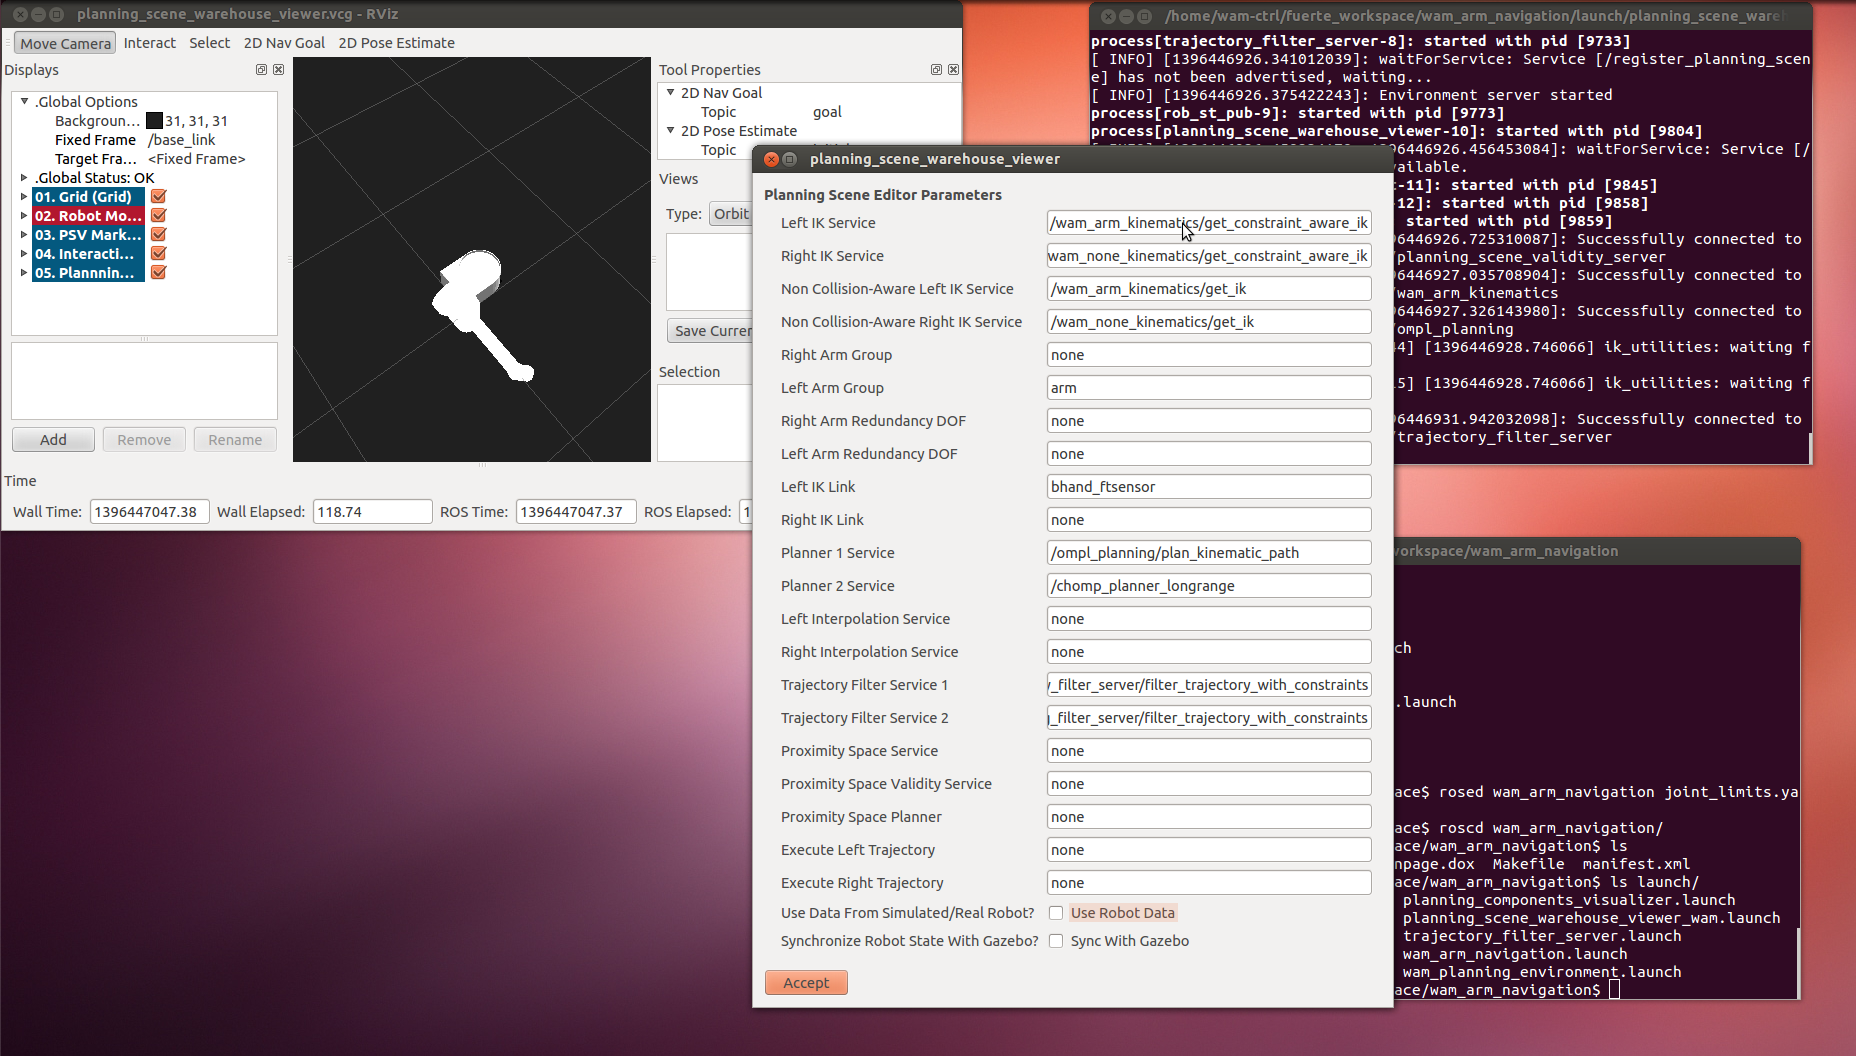
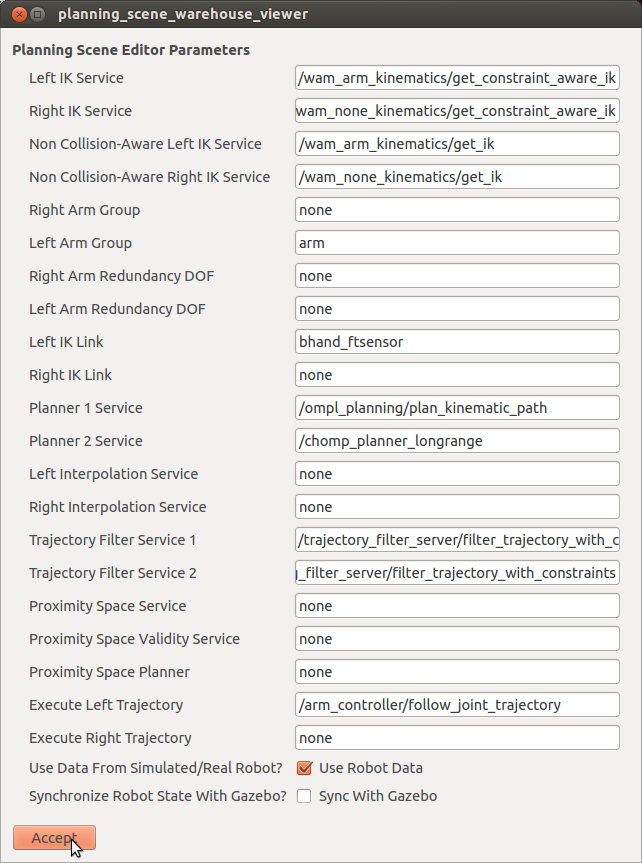
Accept the default paramaters for the warehouse viewer.
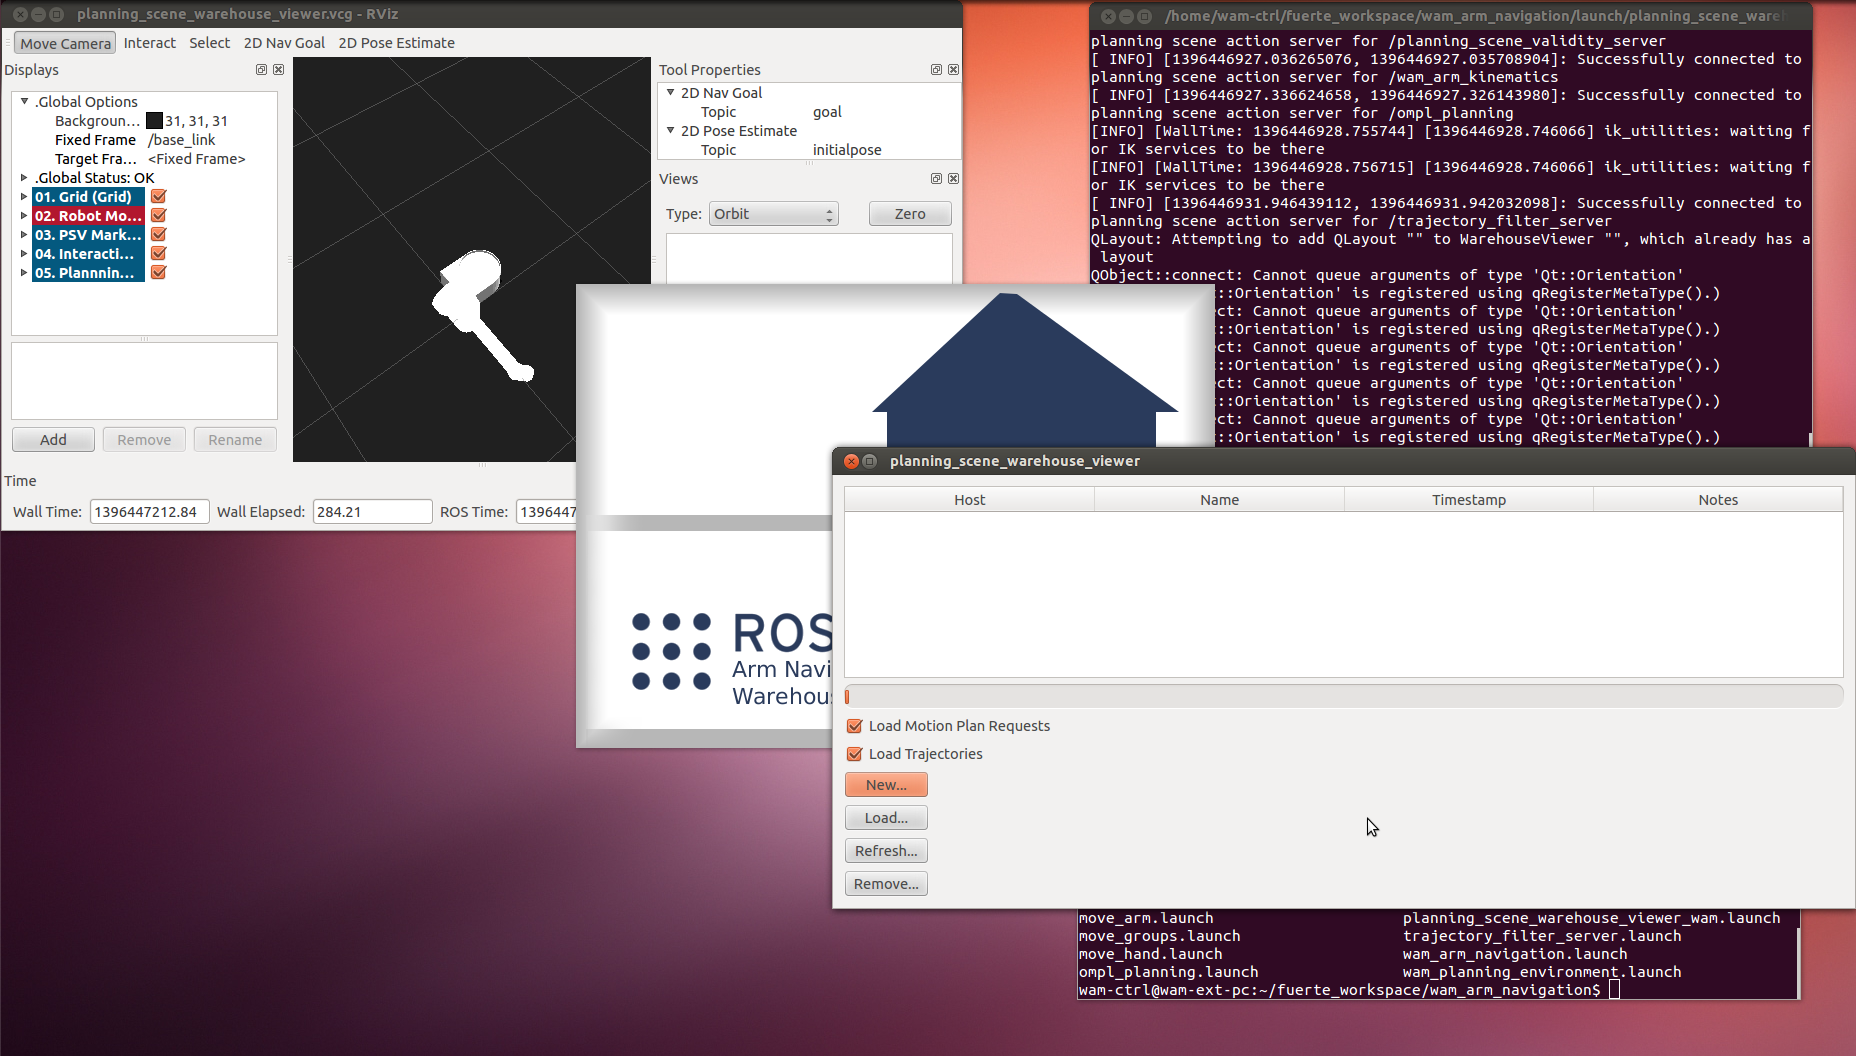
Choose to create a new planning scene in the main window.
You can now create test environments and plan motions in a manner similar to the planning component visualizer.
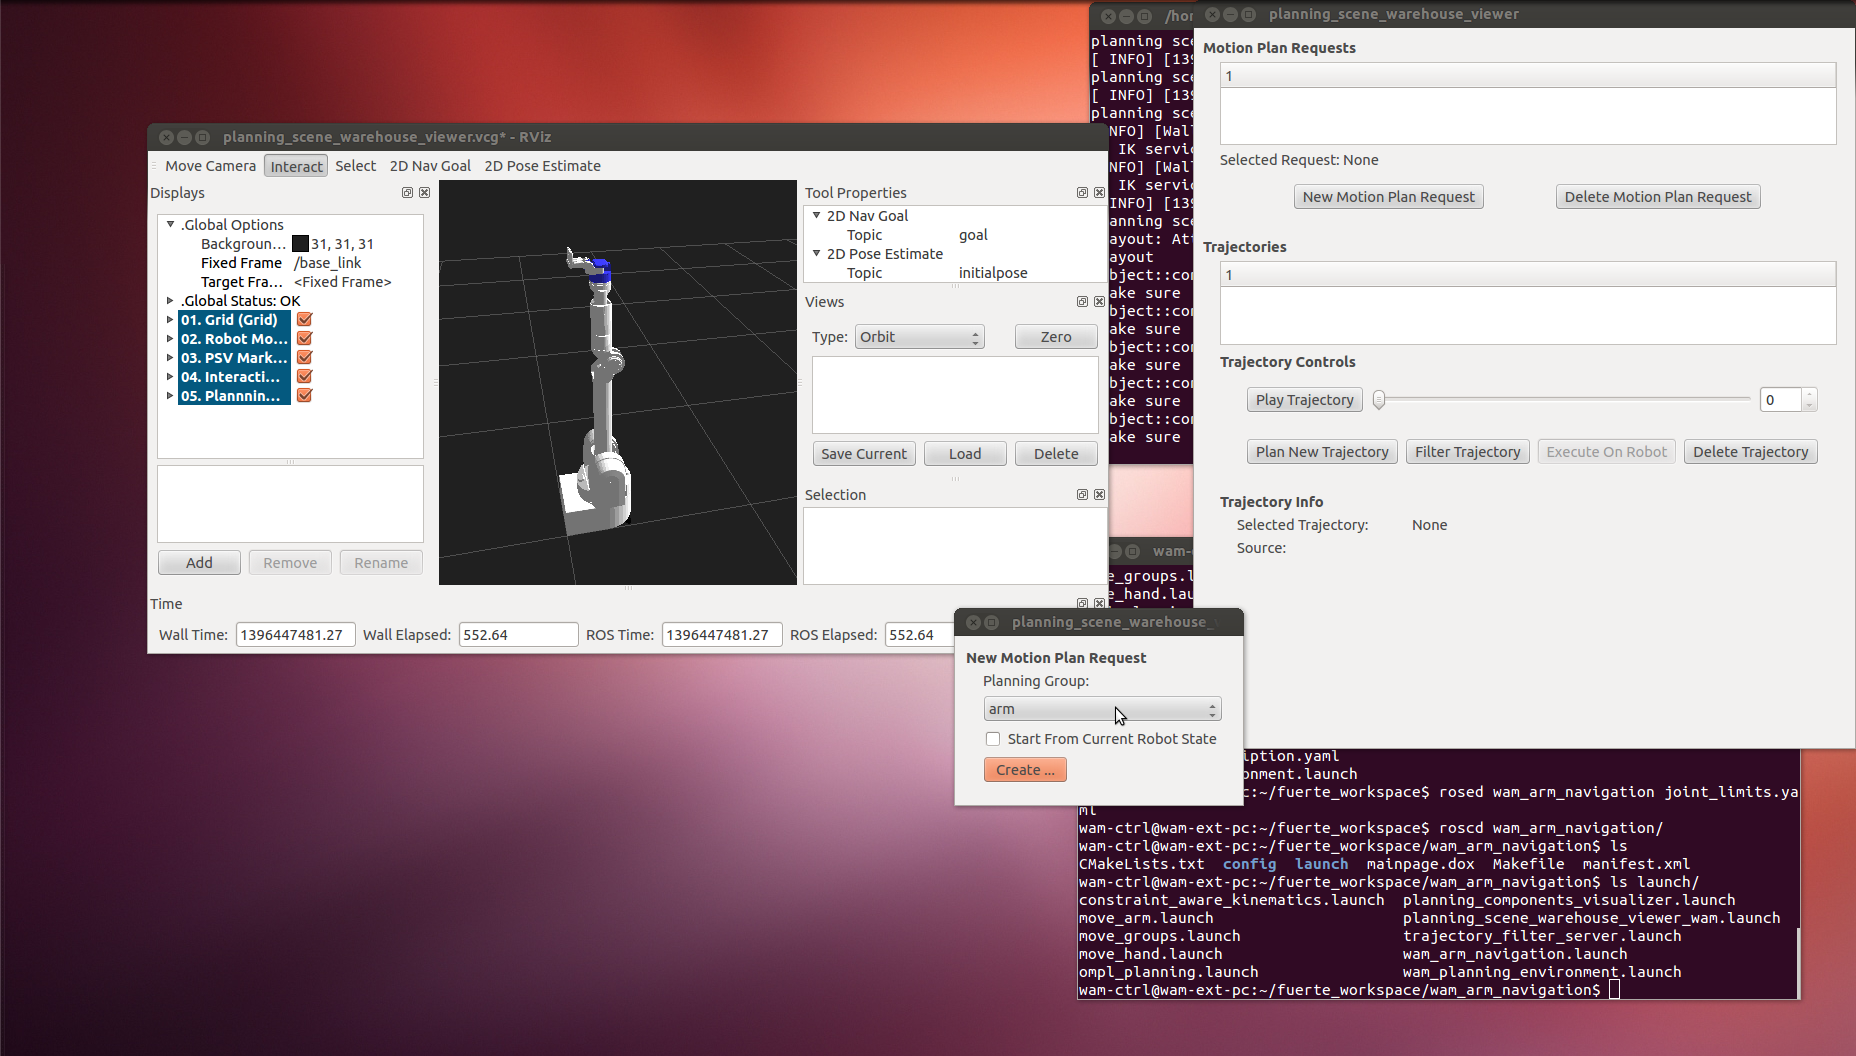
- Create a new motion plan request in the warehouse viewer window.
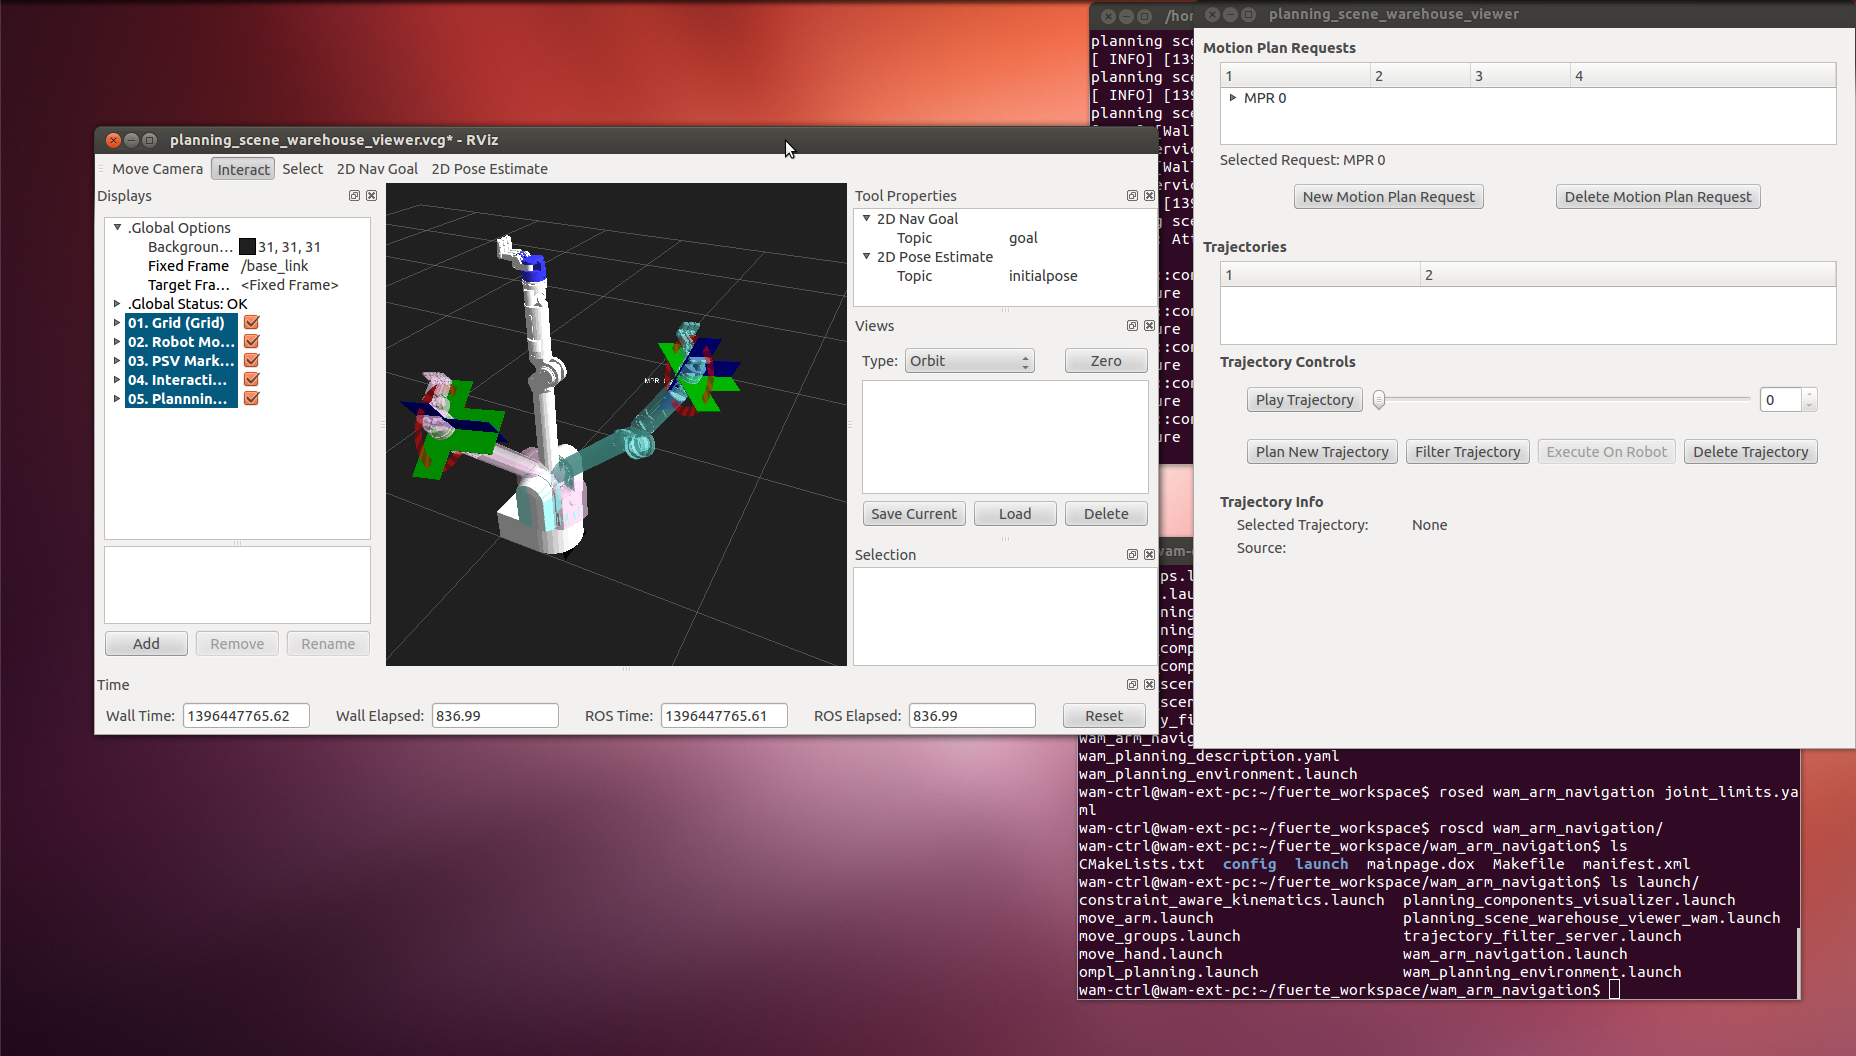
- Click the interact button in RViz. There should be an interactive control for setting the start (blue) and end (purple) positions of the WAM.
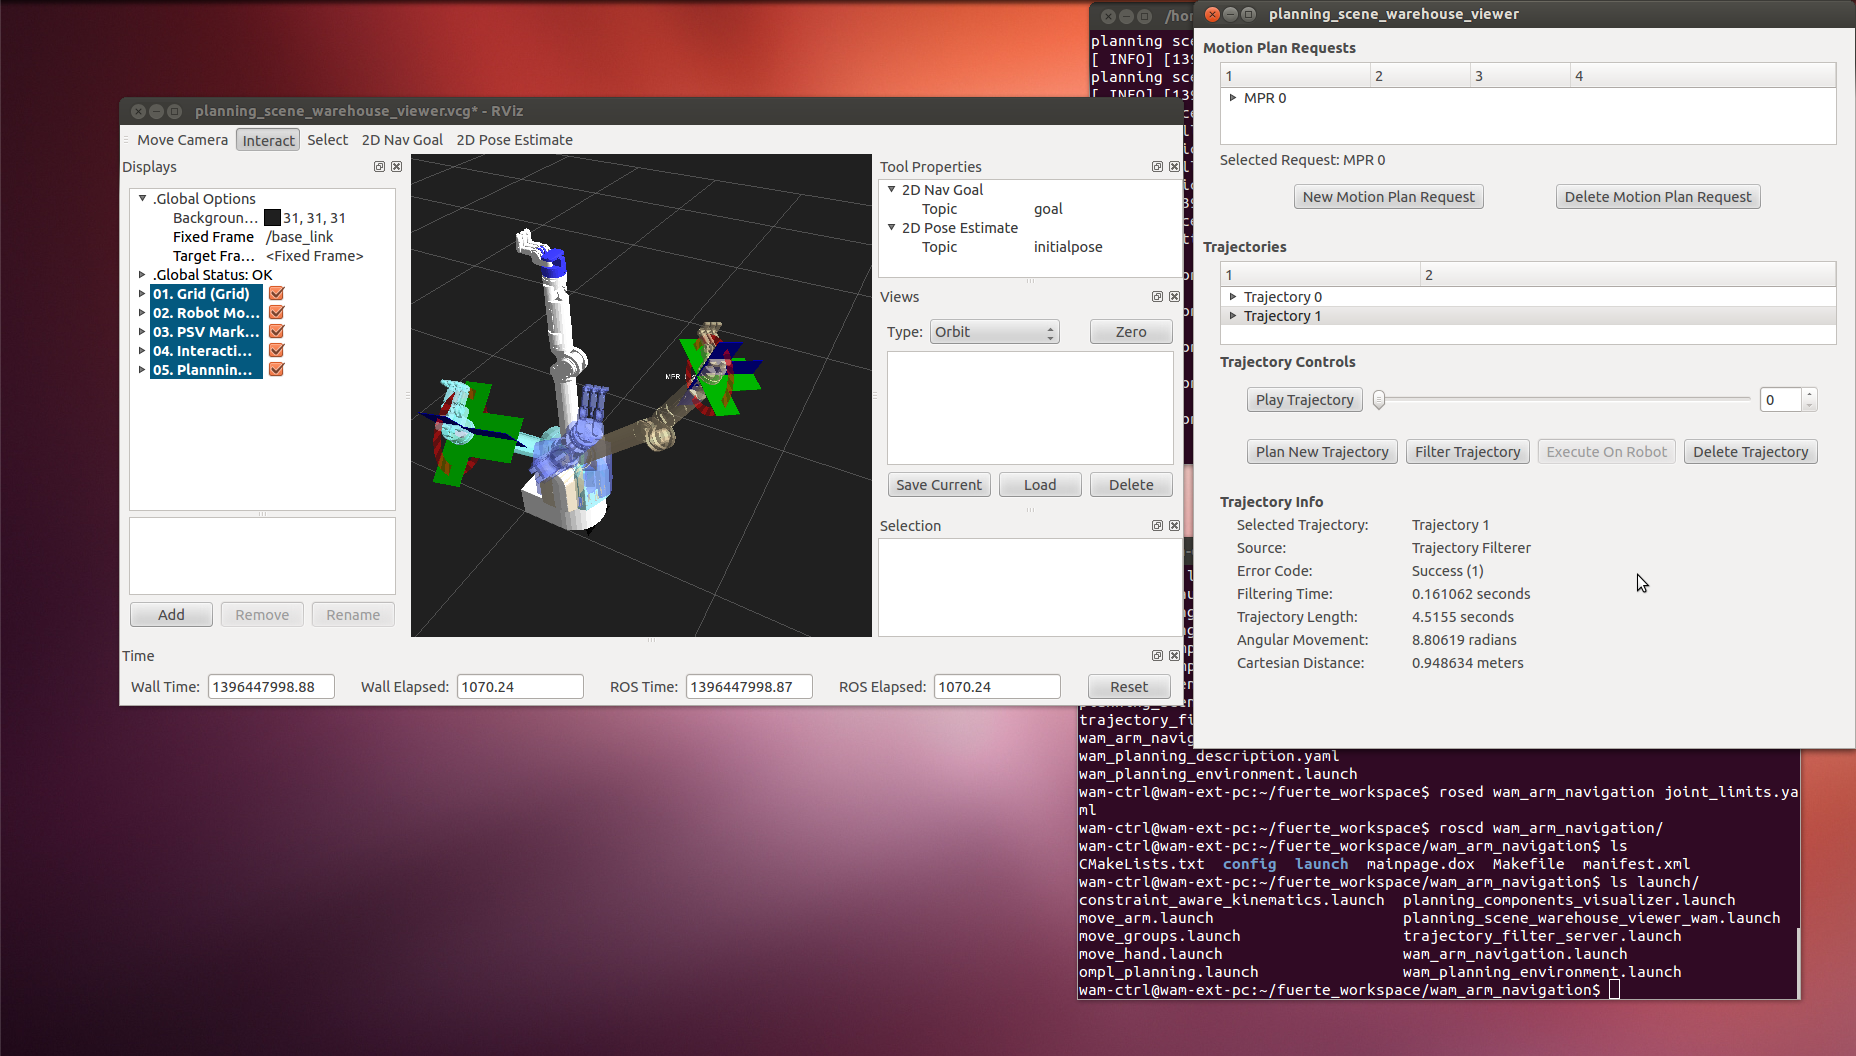
- Click the "Plan New Trajectory" button in the main warehouse viewer window to plan and animate movement of the arm. The "Play Trajectory" button replays the trajectory from any point. "Filter Trajectory" creates a new trajectory where joint movements are within the limits specified in the configuration files. It may take a few attempts to generate a valid trajectory.
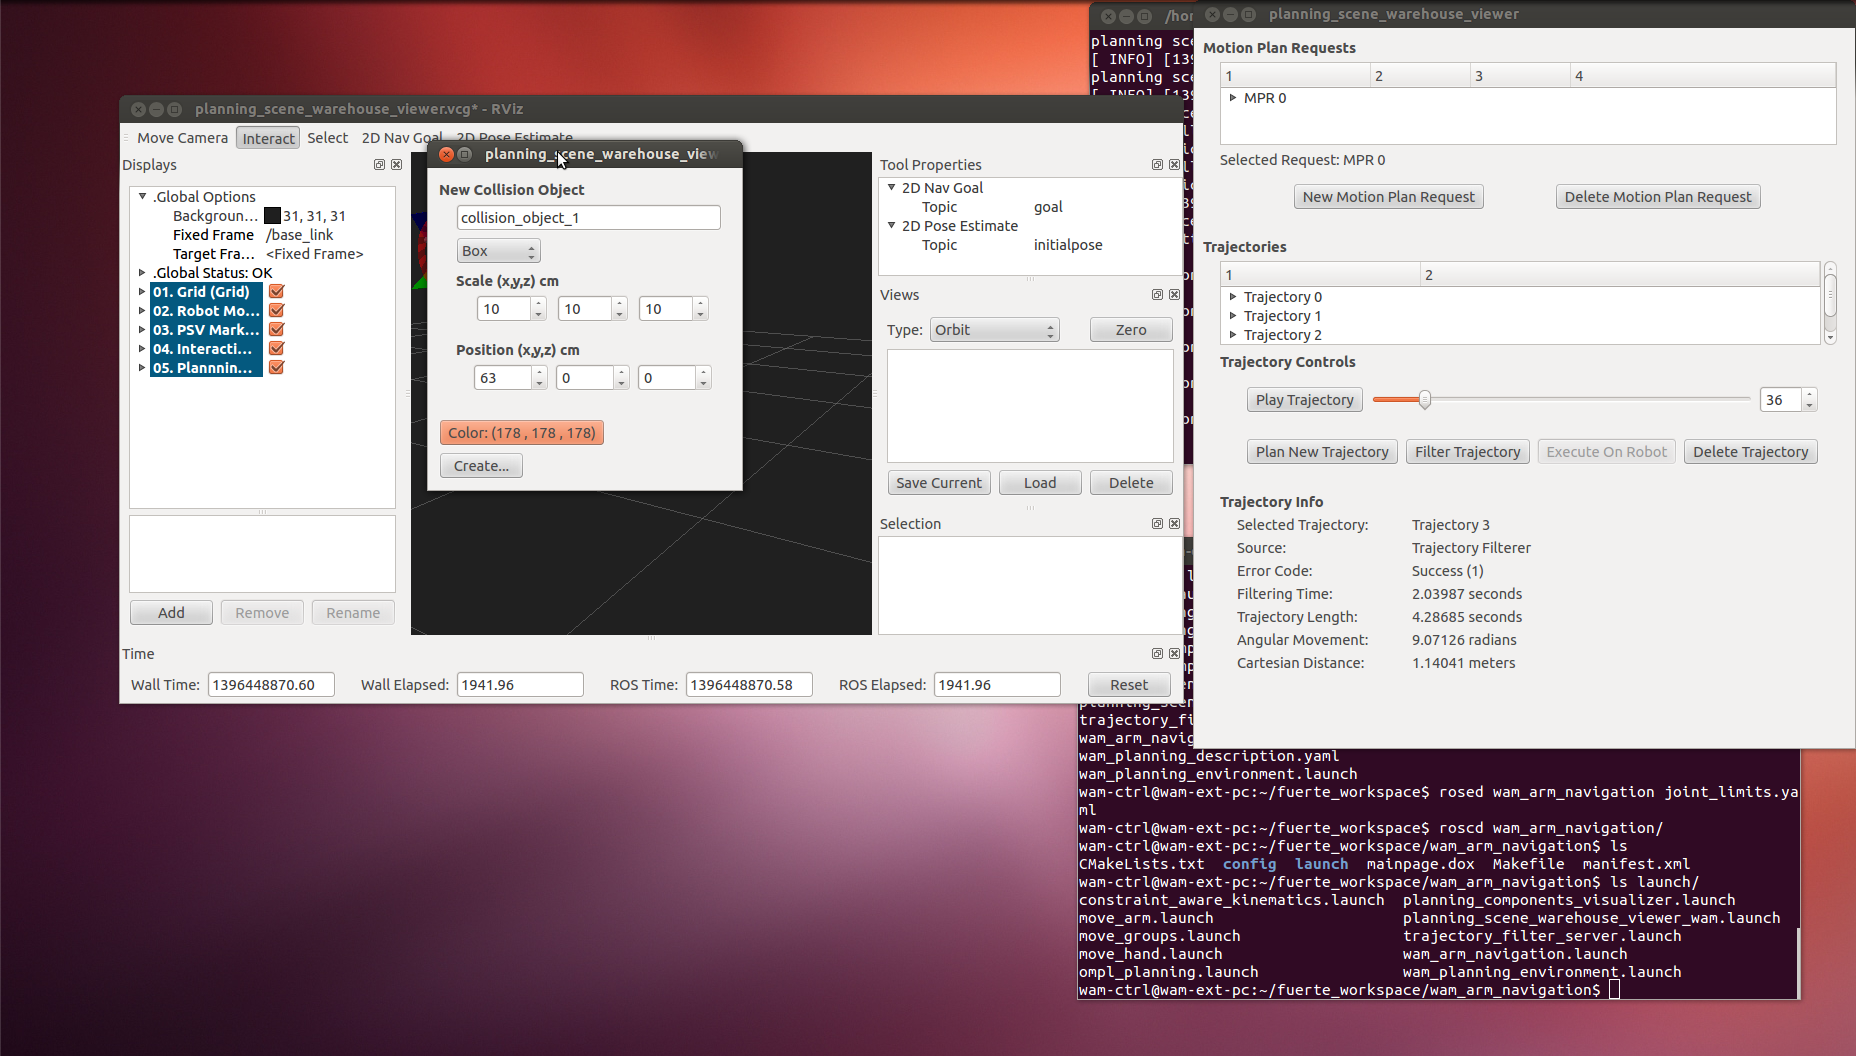
You can also add obstacles from the main window (Top Menu > Collision Objects > New Primitive Collision Object). The position of the obstacle is relative to the base_link which is the bottom right corner of the WAM base when looking at the flat edge of the base. Obstacles can be moved around using their interaction controls.
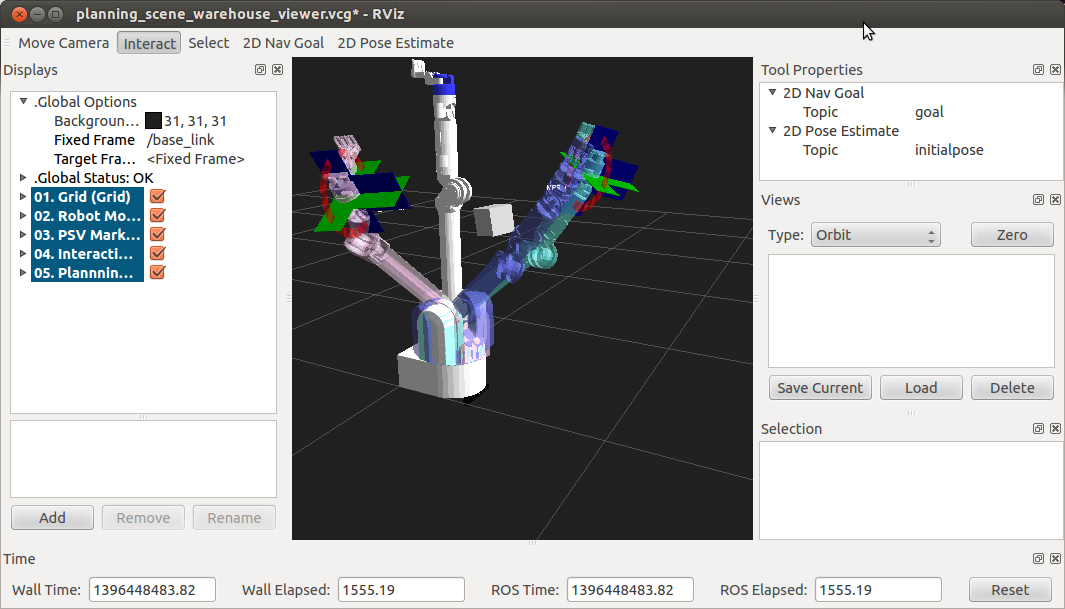
- Below, a trajectory which avoids the cube has been created.
You can save planning scenes from the main menu of the warehouse viewer (File > Save Planning Scene) and load them the next time you start up the warehouse planner.
Warehouse Planning on the Barrett WAM
Using the arm navigation stack on the Barrett WAM requires the development of several extra ROS nodes and some additional configuration for both the main controller computer (wam-ctrl in this tutorial) and the WAM computer (wam by default).
Controller PC
You can use the nodes in the wam_controllers package (in the CSIR manipulation project) to use the warehouse viewer with a real WAM. First add a new launch file to the wam_arm_navigation package based on the automatically generated warehouse planner launch file.
$ roscd wam_arm_navigation/launch
$ cp planning_scene_warehouse_viewer_wam.launch real_wam_warehouse.launch
Then edit the "warehouse_host" and "execute_left_trajectory" parameters, where "wam-ext-pc" is the name of the host computer and can be found using the command hostname in the terminal.
   1 <param name="warehouse_host" value="wam-ext-pc"/>
   2 <param name="execute_left_trajectory" value="/arm_controller/follow_joint_trajectory"/>
Add the following entries to the end of the launch file to start the joint publisher and follow joint trajectory nodes.
   1   <node pkg="wam_controllers" type="wam_joint_pub.py" name="wam_joint_pub" output="screen"/>
   2   <node pkg="wam_controllers" type="wam_follow_joint_trajectory_controller.py" name="wam_follow_jo    int_trajectory_controller" output="screen"/>
   3 </launch>
wamdiscover eases connecting to the Barrett WAM PC over a network and is available from, and explained in, the Barrett wiki. After downloading it, make it executable and place it in your path.
$ chmod a+x wamdiscover.py
$ sudo mv wamdiscover.py /usr/local/bin
Build the wam_common package which contains ROS messages and services for the WAM.
$ rosmake --pre-clean wam_common
WAM PC
Create a CompactFlash card by following the instructions in the Barrett wiki CF creation guide then log on to the WAM PC.
Troubleshooting - Remotely logging on to the WAM PC
If you are unable to connect to the WAM PC over a network connection, you can try checking the kernel logs. They can be examined on a computer with a CF card reader and will be in the root partition (the larger of the two on the card) in /var/log/kern.log. We encountered the following line in our CF card:
Apr 7 11:55:45 localhost kernel: [ 12.174055] irq 10: nobody cared (try booting with the "irqpoll" option)
To add a boot option, edit /grub/menu.lst in the boot partition of the CF card. You have to edit this file as the root user and you can do this from the terminal. The mount point of the boot partition can be found by using the command df -h in the terminal. The size of the boot partition is ~59 MB:
$ cd /media/mount-point-of-CF-boot-partition/grub/
$ sudo cp menu.lst menu.lst.bak
$ sudo gedit menu.lst
Add irqpoll to the end of any lines that begin with kernel:
kernel /vmlinuz-2.6.38.2-ipipe root=/dev/sda2 ro quiet splash irqpoll
Then save, exit, unmount the CF card and try booting the WAM PC with it again.
Before continuing, it may be worthwhile editing sources.list ($ sudo vi /etc/apt/sources.list) in the CF card root partition to use different sources for package installation.
deb http://archive.ubuntu.com/ubuntu precise main
deb http://security.ubuntu.com/ubuntu precise-security main
deb http://archive.ubuntu.com/ubuntu precise universe
You should be ready to install ROS (ros-fuerte-ros-comm) and rosws once you are able to log in to the WAM PC and set up the package manager. Make sure to run the Barrett installation script (~/install_software.sh) beforehand.
$ sudo sh -c 'echo "deb http://packages.ros.org/ros/ubuntu precise main" > /etc/apt/sources.list.d/ros-latest.list'
$ wget http://packages.ros.org/ros.key -O - | sudo apt-key add -
$ sudo apt-get update
$ sudo apt-get install ros-fuerte-ros-comm ros-fuerte-common-msgs ros-fuerte-joystick-drivers ros-fuerte-bullet ros-fuerte-geometry
$ sudo apt-get install python-rosinstall python-rosdep
$ mkdir ~/fuerte_workspace
$ mkdir ~/fuerte_workspace/sandbox
$ rosws init ~/fuerte_workspace /opt/ros/fuerte

Add the following line to the end of .bashrc ($ vi ~/.bashrc)
source ~/fuerte_workspace/setup.bash
$ source ~/.bashrc
Troubleshooting - Dealing with a proxy server
To connect to the internet through a proxy server, you should do the following:
1. Export the proxy address at the end of .bashrc ($ vi ~/.bashrc):
export http_proxy=http://your.proxy.com:1234
Then update the environment variables:
$ source ~/.bashrc
2. Add the proxy address to the package manager configuration ($ sudo vi /etc/apt/apt.conf):
Acquire::http::proxy "http://your.proxy.com:1234";
Acquire::https::proxy "http://your.proxy.com:1234";
Acquire::ftp::proxy "http://your.proxy.com:1234";
3. Configure subversion ($ vi ~/.subversion/servers) by adding the following to the servers file:
http-proxy-host = your.proxy.com
http-proxy-port = 1234
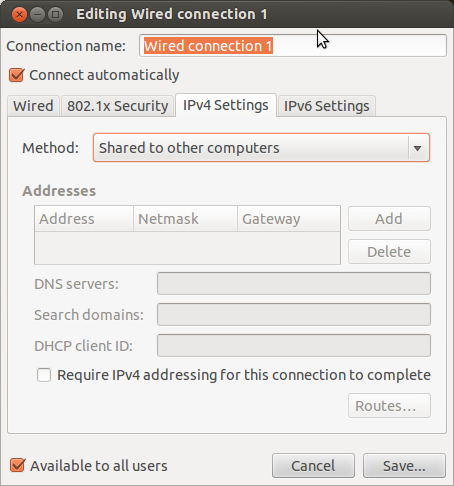
The following steps are only necessary if the proxy server requires authentication from a web browser. As a workaround, you can share the internet connection of a computer connected to the internet (either wirelessly or through an extra Ethernet port) with the WAM PC: [Alt+F2] > Network Connections > Wired > Edit > IPv4 Settings > Method > Shared to other computers.
You can determine the IP address of the WAM PC from the external PC using nmap, replacing 192.168.1 with the first 3 fields of your IP address
$ nmap -sP 192.168.1.0/24
Then ssh into the WAM PC ($ ssh robot@ip.of.wam) and use this connection to install a terminal browser such as lynx.
$ sudo apt-get update
$ sudo apt-get install lynx
You can then connect the WAM PC directly to your network and use the browser to authenticate your connection to the proxy server.
Now copy the patched barrett-ros-pkg over from the external PC. On the external PC:
$ roscd
$ cd sandbox
$ scp -r barrett-ros-pkg robot@ip.of.wam:~/fuerte_workspace/sandbox/
On the WAM PC:
$ roscd
$ rosws set sandbox/barrett-ros-pkg
$ source ~/fuerte_workspace/setup.bash
$ rosmake --pre-clean wam_common
$ rosmake --pre-clean wam_robot
You can copy the calibration files from the CSIR manipulation project to use as a base. On the external PC:
$ roscd
$ cd csir_manipulation/csir_intelligent_manipulator
$ scp *.conf robot@ip.of.wam:/etc/barrett/calibration_data/wam7w/
Run the zero calibration and gravity compensation calibration tools on the WAM PC.
$ bt-wam-zerocal
$ bt-wam-gravitycal
The home position of the CSIR's Barrett WAM is shown in the photo below.
Bringing it all together
Edit ~/.bashrc ($ vi ~/.bashrc) on both the external and WAM PCs to set the ROS environment variables for communication over a network. Suppose the IP of the external PC is 192.168.44.102 and that of the WAM PC is 192.168.44.101 then add the following to .bashrc on the external PC:
export ROS_MASTER_URI="http://192.168.44.102:11311"
export ROS_HOST_NAME=192.168.44.102
export ROS_IP=192.168.44.102
While on the internal WAM PC:
export ROS_MASTER_URI="http://192.168.44.102:11311"
export ROS_HOST_NAME=192.168.44.101
export ROS_IP=192.168.44.101
Update the environment variables on both computers:
$ source ~/.bashrc
You are now ready to start the warehouse planner. On the external PC:
$ roslaunch wam_arm_navigation real_wam_warehouse.launch
Check the "Use Robot Data" option on the warehouse configuration screen then accept the configuration.
Start the wam_node on the WAM PC and follow the libbarrett startup instructions:
$ roslaunch wam_node wam_node.launch
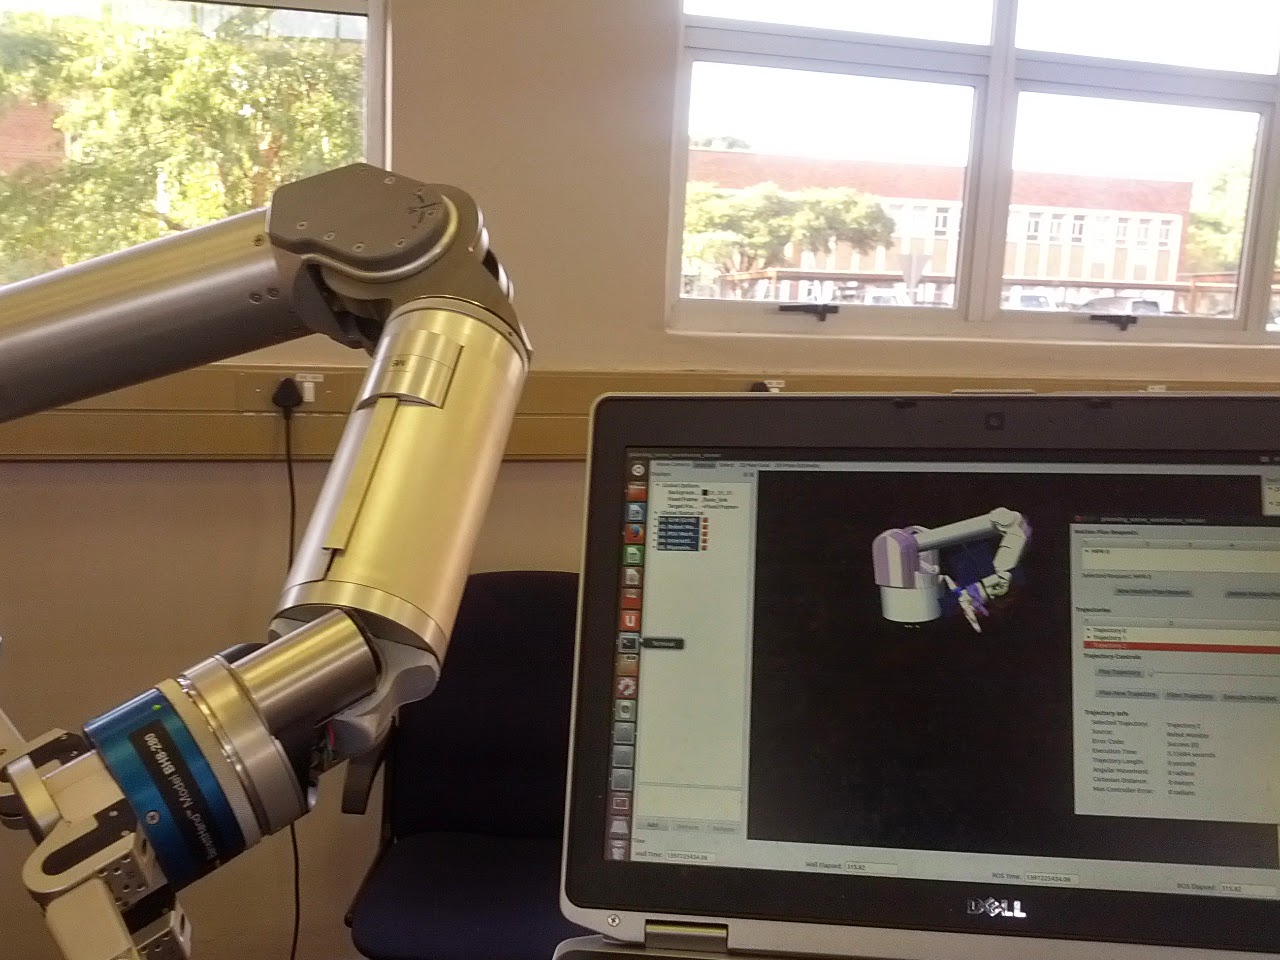
You can now use the planning warehouse as before (in section 1.5), with the ability to execute filtered trajectories on the real robot. Only execute filtered trajectories on the real robot.


